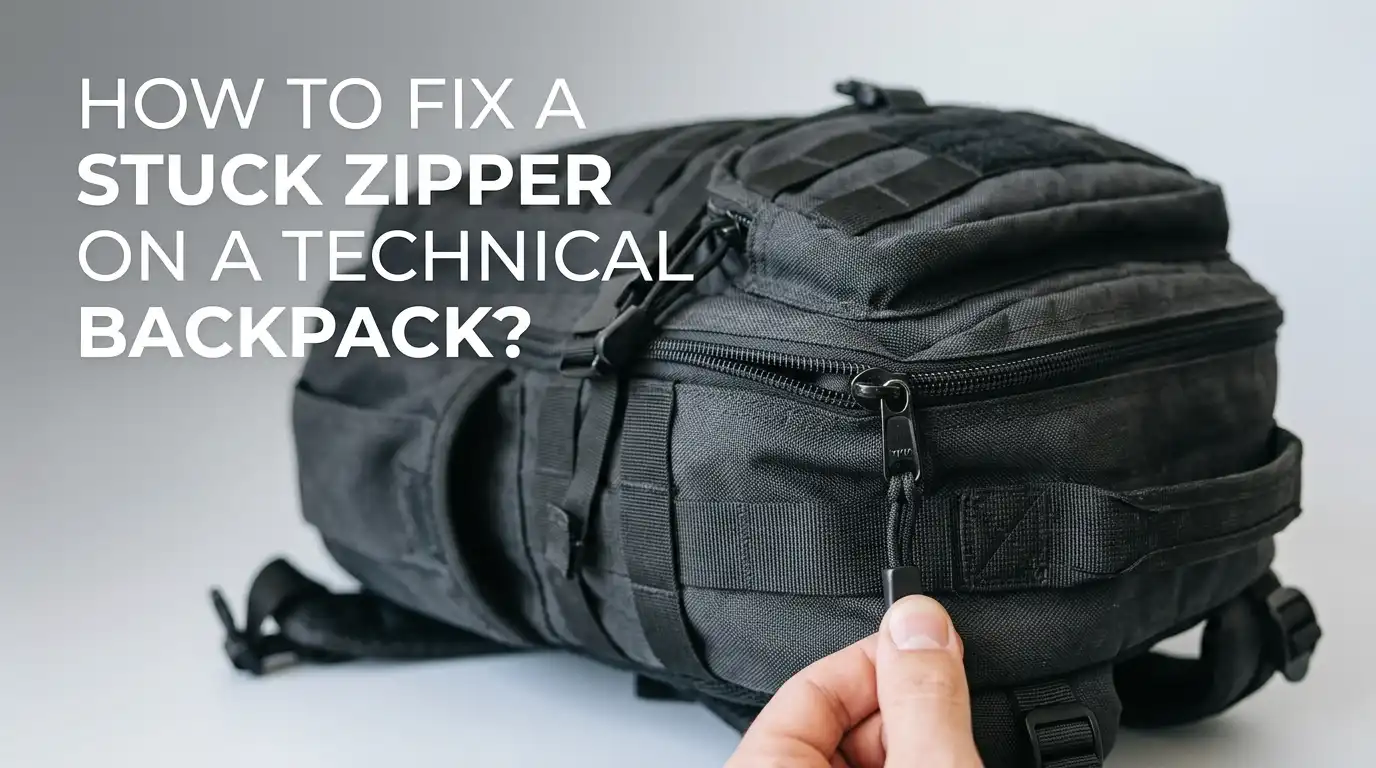
How to Fix a Stuck Zipper on a Technical Backpack?
A stuck zipper on your favorite technical backpack can ruin your morning commute, a weekend hike, or even a big trip. You pull the tab and nothing moves. The teeth refuse to budge.
Maybe fabric is caught inside, or the slider has simply given up after years of loyal service. It happens to the best backpacks, from rugged outdoor gear to sleek urban daypacks.
The good news is that you do not need to throw away your backpack or spend money on a professional repair. Most stuck zipper problems have simple fixes that you can do at home with items you already own.
Key Takeaways
- Fabric caught in the zipper teeth is the number one cause of stuck backpack zippers. Gently pull the fabric away while wiggling the slider. Never yank hard because that can tear the fabric or damage the teeth.
- Lubrication solves most dry or stiff zipper problems instantly. A graphite pencil, candle wax, bar soap, or lip balm can all work as quick zipper lubricants. Apply a small amount and work the slider back and forth.
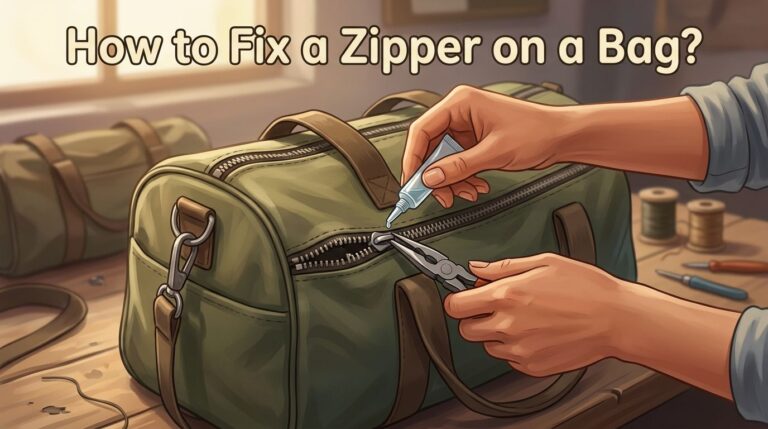
- Pliers are the most important tool for zipper repair. You can use needle nose pliers to squeeze a loose slider back into shape, remove broken teeth, or pry open a stuck slider without damaging the zipper tape.
- You can replace a zipper slider without sewing or special tools. Simply remove the top stops, slide the old slider off, put a new one on, and reattach the stops. This takes less than ten minutes.
- Prevention is far easier than repair. Clean your zipper teeth regularly with a soft brush and lubricate them once every few months. Zip gently and never force a zipper that resists movement.
- Most stuck zippers need only five minutes and one household item to fix. Before you panic or replace your backpack, try the simple methods in this guide. Chances are your zipper just needs a tiny bit of help.
Understand Why Your Technical Backpack Zipper Gets Stuck
A zipper looks simple from the outside but it has several small parts working together. The slider moves up and down the track and pushes the teeth or coils to interlock.
The teeth or coil create the seal. The tape is the fabric strip that holds the teeth and gets sewn onto your backpack. The pull tab gives you something to grip. The stops at each end prevent the slider from coming off the track.
When any of these parts fails or gets blocked, the zipper stops working. The most common reason a technical backpack zipper sticks is because fabric from the bag’s flap or inner lining gets caught between the teeth.
Technical backpacks often have storm flaps, rain covers, or thick lining material that easily snags. Dirt, sand, and trail dust also build up inside the zipper teeth over time and create friction.
On older backpacks, the slider gradually widens from repeated use and loses its grip on the teeth, causing misalignment. Knowing what part has failed makes the repair much faster and easier.
Gather the Basic Tools You Need Before You Start
You do not need a fancy workshop to fix a stuck zipper. Most repairs require only one or two common household items. Start with a graphite pencil. The soft graphite tip works as a dry lubricant that does not attract dust.
Next, grab a pair of needle nose pliers. These help you squeeze sliders, remove stops, and grip small parts. A small flathead screwdriver can help you gently pry fabric out of stuck teeth without tearing it.
Keep a bar of dry soap, a candle, or a lip balm nearby as backup lubricants. A soft toothbrush is perfect for cleaning dirt out of the zipper teeth. If you plan to replace a slider, you may want a zipper repair kit that includes replacement sliders and metal stops.
A pair of tweezers helps pull out tiny threads or debris from between the teeth. Good lighting and a flat work surface make every repair easier. Lay down a light colored cloth so you can see any small parts that might fall.
Check for Fabric Caught in the Zipper Teeth First
Fabric jams cause more stuck zippers than anything else. Your backpack likely has a fabric flap that covers the zipper to keep rain out. That flap, or even the inner lining, can easily get sucked into the slider as you zip. The first sign is that the slider refuses to move in either direction, no matter how hard you pull.
Stop pulling immediately. Look closely at the area around the slider. Find where the fabric enters the teeth. Hold the trapped fabric firmly with one hand and pull it gently away from the zipper, opposite to the direction it was pulled in.
With your other hand, wiggle the slider back and forth in tiny movements. Do not yank. Small, patient wiggles usually free the fabric within a minute.
If the fabric is truly jammed, use a flathead screwdriver to gently push the fabric out from between the teeth. Once free, inspect the fabric for tears and trim any loose threads with scissors so they cannot get caught again.
Pros: This fix is free, fast, and requires zero tools. Cons: If you have already pulled too hard, the fabric may be torn or the zipper teeth may be bent beyond simple repair.
Lubricate the Zipper with Graphite from a Pencil
Graphite is one of the best zipper lubricants you can find at home. It is dry, so it does not attract dust and dirt like oil based lubricants do.
To use it, take a standard graphite pencil and rub the tip firmly along both sides of the zipper teeth. Focus on the area where the slider is stuck. Rub back and forth several times so the graphite powder falls between the teeth and coats the metal or plastic.
Once you have applied enough graphite, grip the pull tab and gently work the slider up and down. Start with tiny movements. The graphite reduces friction and helps the teeth glide past each other inside the slider channel.
If the zipper still feels stiff, apply more graphite and try again. This method works especially well on metal zippers and coil zippers that have become stiff from age or lack of use.
After the zipper moves freely, zip and unzip it fully several times to spread the graphite evenly along the entire track. Wipe away any excess powder from the fabric with a dry cloth.
Pros: Graphite is clean, dry, widely available, and does not stain fabric. Cons: You need to reapply it periodically. It may not work on zippers that are severely rusted or physically damaged.
Use Candle Wax or Bar Soap as a Quick Lubricant
When you do not have a pencil handy, candle wax and bar soap make excellent emergency zipper lubricants. Both create a slick coating that helps the slider move over stubborn teeth.
Take an unlit candle or a dry bar of soap and rub it directly along both sides of the zipper teeth. Cover the entire stuck section and a few inches beyond it on both sides. The wax or soap will leave a thin, slippery film on the metal or plastic teeth.
After applying, gently work the slider back and forth. Do not force it. The lubricant needs a moment to work its way into the tight spaces inside the slider. Once the slider begins to move, zip the backpack fully open and closed a few times.
This distributes the wax evenly along the whole zipper. Wipe off any visible residue from the fabric with a dry paper towel.
Candle wax works especially well in cold weather because it does not freeze or get sticky. A small tea light or a stub of bar soap weighs almost nothing and can easily live in your backpack repair kit for trailside fixes.
Pros: Both items are found in almost every home and work instantly. Cons: Wax and soap can leave visible residue on dark fabric. They also wear off faster than graphite and need more frequent reapplication.
Apply Lip Balm for a Stuck Zipper on the Trail
Lip balm is a surprisingly effective zipper lubricant and most people carry some in their backpack. The waxy texture of lip balm works exactly like candle wax but comes in a convenient small tube.
If your zipper jams while you are hiking, pull out your lip balm and rub a thin layer directly onto both sides of the zipper teeth. Cover the stuck area completely and extend a few inches above and below.
Let the balm sit for about 30 seconds to soften any dirt or debris stuck in the teeth. Then gently work the slider back and forth in short motions. The balm reduces friction and helps the teeth realign inside the slider channel.
Once the zipper frees up, zip it open and closed fully several times to spread the balm. This method works well on both coil and tooth zippers. Avoid using flavored or medicated balms because the extra ingredients may attract dirt.
A plain, waxy balm is best. This is one of the simplest trailside fixes you can do and it has saved many hiking trips from ending early due to gear failure.
Pros: Lip balm is portable, clean, and almost always available in a backpack. Cons: It can get sticky in hot weather and may collect dust over time. It is best as a temporary fix, not a permanent solution.
Clean Dirt and Debris from the Zipper Teeth
Trail dust, sand, mud, and tiny fibers build up between zipper teeth over months of use. This hidden grit acts like sandpaper inside the slider and gradually causes the zipper to jam. A zipper that feels gritty or rough when you pull it probably needs a thorough cleaning before anything else.
Start by unzipping the backpack as far as it will go. Use a soft toothbrush to gently scrub along both sides of the teeth. Brush in the direction of the teeth, not against them. This loosens packed dirt without bending the delicate metal or plastic coils.
For stubborn grime, dip the toothbrush in a mix of warm water and mild dish soap. Scrub gently and wipe away the loosened dirt with a clean cloth.
Let the zipper dry completely before you try to operate it. You can also use a can of compressed air to blow debris out of the slider channel. A clean zipper is a happy zipper, and this simple maintenance step prevents most jams from ever happening.
Pros: Cleaning is free, safe for all zipper types, and prevents future problems. Cons: A deep clean takes about 15 minutes and the zipper must dry fully before use. Severely corroded metal zippers may need replacement.
Realign Misaligned Zipper Teeth with Pliers
Sometimes the zipper slider moves but the teeth behind it do not interlock. You zip the backpack closed and the track splits open right behind the slider. This happens when one or more teeth get bent out of position and the slider can no longer mesh them together properly.
To fix this, first unzip the backpack completely so you can see the problem area clearly. Use good lighting and locate the bent tooth. It will look slightly higher, lower, or twisted compared to its neighbors.
Take your needle nose pliers and gently grasp the bent tooth. Apply very light pressure and bend it back into alignment with the other teeth. Be extremely gentle, especially with plastic coil zippers, because too much force can snap the tooth off entirely.
Work slowly and check your progress frequently by test zipping. If multiple teeth are bent, fix them one at a time from bottom to top. Once all teeth look straight, zip the backpack fully a few times to confirm the track stays closed. This fix works on both metal tooth and plastic coil zippers.
Pros: Pliers give you precise control and this fix is permanent when done correctly. Cons: Over bending a tooth can break it. Coil zippers with multiple damaged coils may need a slider replacement instead.
Squeeze a Loose Slider to Restore Its Grip
Over time, the metal channel inside a zipper slider gradually widens from repeated use. A loose slider cannot press the teeth together firmly enough, so the zipper either fails to close or splits open behind the slider. You can often fix this by squeezing the slider back to its original shape.
Unzip the backpack and look at the slider from the side. The slider has two channels, one on each side, where the teeth pass through. When these channels widen, the teeth do not mesh tightly.
Take your needle nose pliers and position them on the flat sides of the slider body, not the pull tab. Gently squeeze the slider just enough to narrow the channels by a fraction of a millimeter. Do this on both the top and bottom of the slider if needed. Test the zipper.
If it still does not grip, squeeze a tiny bit more. Work in very small increments. Overtightening the slider will make the zipper impossible to move. This method extends the life of a worn slider by months or even years and costs nothing at all.
Pros: This fix is free, fast, and requires only a pair of pliers. Cons: It is a temporary fix for worn sliders. Eventually the metal fatigues and the slider must be replaced.
Replace a Broken Slider Without Any Sewing
When the slider itself is cracked, bent beyond repair, or fully seized, you need to replace it. You can swap a slider on a technical backpack without sewing a single stitch. The process takes about ten minutes once you understand the steps.
First, use pliers to remove the metal top stops from both sides of the zipper tape. These are the small metal clamps at the top that stop the slider from coming off. Pry them open gently and slide them off.
Note that some backpacks use sewn fabric stops instead. If yours does, carefully cut the threads and remove the stop. Once the stops are off, slide the old broken slider down and off the zipper tape.
Take your new slider, which must be the same size and type as the old one, and slide it onto the tape from the top. Start both sides evenly into the slider channels. Pull the slider down a few inches and test that the teeth mesh correctly.
Then use pliers to clamp new metal top stops onto the tape, or sew a new fabric stop with a needle and strong thread. Test the zipper fully to make sure the new slider does not come off.
Pros: Slider replacement costs very little and gives your backpack a completely new zipper function. No sewing machine needed. Cons: You must find the correct slider size. Removing old stops can damage the tape if done roughly.
Use a Makeshift Zipper Pull When the Tab Breaks Off
The metal or plastic pull tab can snap off, especially on older backpacks. Without a tab, you have nothing to grip and the zipper slider becomes useless. Before you replace the entire slider, try creating a temporary pull tab from something you already carry.
A paper clip works perfectly. Unfold the paper clip halfway and thread the end through the small hole on the slider body where the original tab was attached. Bend the wire back and twist it to secure.
You now have a sturdy loop to grip. A small key ring also works well. Simply hook it through the slider hole. If you carry zip ties, thread one through the hole, cinch it into a small loop, and trim the excess. Paracord makes another excellent pull.
Cut a short piece, thread it through the hole, and tie a knot. These makeshift pulls are surprisingly durable and many people use them for years before replacing the slider. This quick fix keeps your backpack functional until you can do a proper repair at home.
Pros: Requires no tools in most cases and uses items you already own. Fixes the problem in under a minute. Cons: The makeshift pull may be less comfortable to grip than the original tab. It is best as a temporary solution.
Fix a Zipper That Keeps Sliding Down on Its Own
A zipper that unzips itself is almost as frustrating as one that will not move. This happens when the slider has worn down and loses friction, or when the locking mechanism inside the slider stops working.
Many technical backpack zippers have an auto lock feature that keeps the slider in place. When that lock fails, gravity and movement pull the slider down.
First, try squeezing the slider gently with pliers as described earlier to improve grip. If the zipper still slides down, use a small rubber band or hair tie. Loop it through the pull tab hole and hook the other end over a nearby strap buckle or D ring on your backpack.
This holds the zipper in the closed position. A key ring trick also works. Attach a key ring to the zipper pull and hook it over a button or strap to keep the zipper up. For a more permanent fix, use a tiny dab of clear nail polish on the zipper teeth near the top. Let it dry fully.
The slight texture it creates adds friction and helps the slider stay put. Replace the slider if these tricks stop working.
Pros: These methods are free and take seconds to set up. Cons: They are temporary fixes. A worn slider will continue to worsen and need replacement eventually.
Know When to Visit a Professional Repair Service
Some zipper problems go beyond simple DIY fixes. You should seek professional help if the zipper tape itself is torn, frayed, or pulling away from the backpack fabric.
A torn tape requires sewing that most home repair kits cannot handle well. If multiple zipper teeth are missing from a coil zipper, the entire zipper chain may need replacement. This is a job for someone with a heavy duty sewing machine.
Corrosion is another major red flag. If you use your backpack near salt water and the metal zipper parts show white or green crusty buildup, the internal mechanism may be corroding.
You can try cleaning with rubbing alcohol, but deep corrosion usually means a full zipper replacement. Professional outdoor gear repair shops have the right tools, replacement parts, and experience to fix these bigger problems.
The cost is almost always far less than buying a new technical backpack. Many manufacturers also offer repair services for their own products. Check your backpack brand’s website before going to a third party shop.
Prevent Future Zipper Problems with Simple Habits
The best zipper repair is the one you never need to make. A few small habits will keep your backpack zippers working smoothly for years.
Clean the zipper teeth once a month with a soft brush to remove dust and grit before it builds up. Apply a dry lubricant like graphite or silicone spray every two to three months, especially if you use the backpack daily or in dusty conditions.
Always zip and unzip your backpack gently. Pull the slider in a straight line along the track rather than at an awkward angle. When the zipper feels tight, stop and check for obstructions instead of forcing it.
Do not overstuff your backpack compartments. Too much pressure from inside strains the zipper teeth and makes the slider work harder. Before washing your backpack, zip all compartments fully closed to prevent the slider from snagging on other items in the wash.
Finally, store your backpack with the zippers closed. This keeps the coils or teeth in their proper resting position and prevents the slider from developing unnecessary play. These small steps take almost no time and will dramatically reduce zipper failures.
Frequently Asked Questions
Can I use WD-40 to fix a stuck backpack zipper?
You can use WD-40 in an emergency but it is not recommended. WD-40 is a petroleum based product that attracts dust and dirt. The zipper will feel smooth at first but become sticky and gummed up within a few weeks. Stick with dry lubricants like graphite, candle wax, or silicone spray instead. If you must use WD-40 on the trail, clean the zipper thoroughly with soap and water when you get home and reapply a dry lubricant.
How do I know what size replacement slider to buy?
Look for a number stamped on the back of your current slider, such as 5, 8, or 10. This is the zipper size. If there is no number, measure the width of the zipper teeth in millimeters when closed. Size 5 zippers are common on lightweight daypacks. Size 8 and 10 are used on heavy duty hiking and travel backpacks. Take the old slider to a fabric store or outdoor gear shop to match it if you are unsure.
What should I do if the zipper teeth are completely missing from a section?
Missing teeth on a coil zipper usually mean the entire zipper needs replacement by a professional. You can temporarily isolate the damaged section by placing zipper stops above and below the gap, but this reduces the zipper opening. On tooth zippers, individual teeth can sometimes be replaced from a repair kit, but the fix is delicate and not always permanent.
Can a stuck zipper damage the waterproofing on my technical backpack?
Yes. Forcing a stuck zipper can tear the fabric around the zipper tape and break the waterproof seal on a technical backpack. Many outdoor packs use water resistant zippers with a special coating on the tape. Rough handling can peel or crack this coating. Always free a stuck zipper gently using the methods in this guide to protect your backpack’s weather resistance.
How often should I lubricate my backpack zippers?
Lubricate your zippers once every two to three months under normal use. If you use your backpack daily, hike in dusty conditions, or live near the beach, lubricate them monthly. A quick graphite pencil rub takes less than a minute and will keep your zippers sliding like new.

Hi, I’m Luna Beck — the founder and voice behind Urban Pack Vault. I’m passionate about helping people find bags that perfectly match their lifestyle. From backpacks to travel luggage, I research, review, and recommend so you never have to second-guess your next purchase.