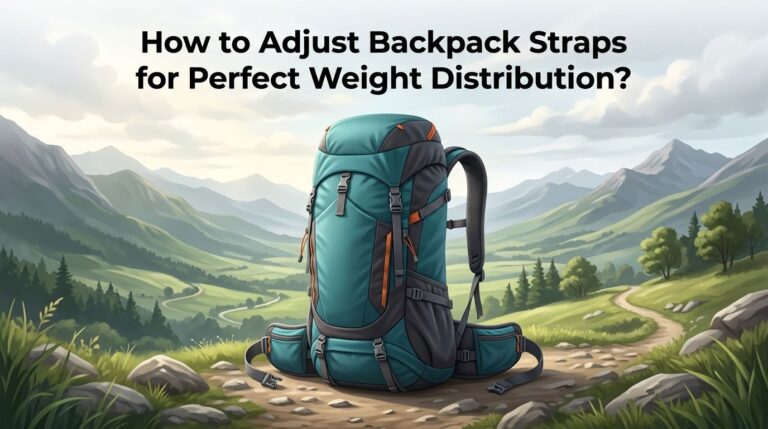
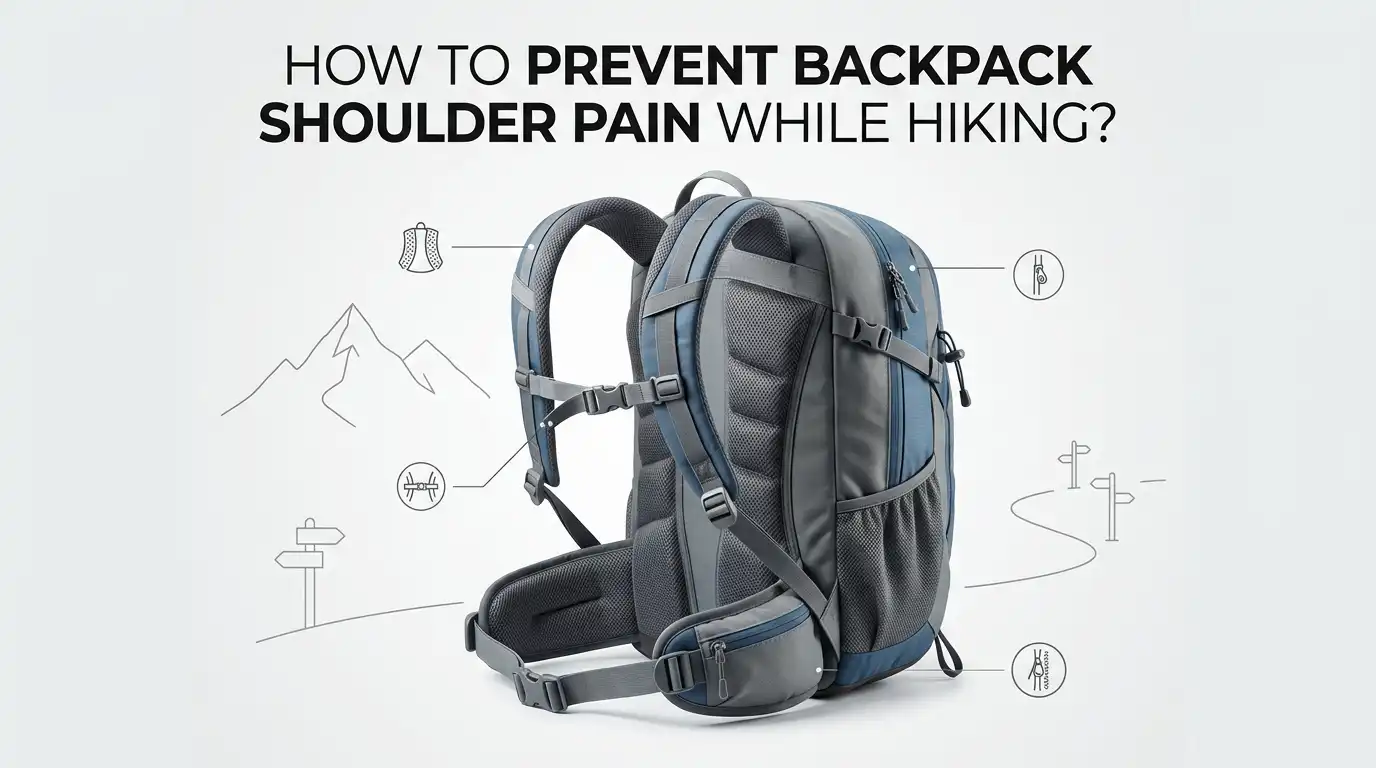
How to Prevent Backpack Shoulder Pain While Hiking?
Shoulder pain can turn a great hike into a slow and frustrating day. Many hikers think the answer is simple, carry less. That helps, but pain often starts because the pack fits badly, the straps are set wrong, or the load sits in the wrong place.
The good news is that most backpack shoulder pain can improve fast with a few smart changes. You do not need to guess. You need a clear plan that starts with pack fit, moves to load control, and ends with better movement on the trail.
In this guide, you will learn simple fixes that work together. Some take two minutes. Some take a few weeks. All of them can help you hike with less strain and more comfort.
Key Takeaways
- Your hips should carry most of the load. If your shoulders feel crushed, your pack setup is likely off. A well fitted hip belt should take most of the weight, while the shoulder straps should mainly keep the pack close to your body.
- Pack fit matters more than price. A costly pack can still hurt you if the torso length is wrong. Start with size and fit first, then adjust shoulder straps, load lifters, and chest strap in that order.
- How you pack matters every mile. Heavy gear should sit close to your back and near the middle of the pack. If the load hangs low or far from your spine, your upper body works harder and your shoulders feel it first.
- Lighter is usually better, but balance matters too. Cutting weight helps, yet a badly packed light bag can still cause pain. A stable load often feels better than a sloppy load, even when the scale looks fine.
- Your body needs help from training and movement. Strong hips, core, and upper back muscles reduce strain on small shoulder muscles. Short warm ups, simple strength work, and quick trail breaks can lower pain before it builds.
- Pain is a signal, not a challenge. Numbness, tingling, sharp pain, or pain that stays after the hike deserves attention. Early action is easier than a long recovery, so adjust fast and seek care if symptoms do not settle.
Why shoulder pain starts on the trail
Backpack shoulder pain usually starts with pressure, poor load transfer, or tired muscles. If the pack hangs from your shoulders instead of resting on your hips, the upper traps, neck, and small shoulder muscles work too hard with every step.
A second cause is poor load position. When heavy gear sits far from your back, your body leans to balance it. That extra effort can tighten your shoulders and upper back. Long straps can also let the pack drop too low, which often makes posture worse.
Pros: Knowing the real cause helps you fix pain faster. You stop blaming your body and start changing the setup. Cons: Many causes can overlap, so one quick fix may not solve everything.
The best approach is simple. Check fit first, then load placement, then your movement and recovery habits.
Start with the right pack size
A pack that is too big or too small often causes shoulder pain before the hike even gets going. Many people choose a pack by overall height or by capacity alone. That is a mistake because torso length matters more than body height.
If the pack is too long, the shoulder straps can pull in the wrong spot. If it is too short, the hip belt may ride too high and dump weight back onto your shoulders. A pack can also feel fine in the store and still fail on the trail if the size is wrong.
Pros: The right size makes every other adjustment easier. It also improves balance and comfort with less effort. Cons: A good size match can take time to test, and some hikers fall between sizes.
If shoulder pain keeps coming back, do not start with new exercises or tougher padding. Start by checking whether the pack size is correct for your body.
Fit your torso length first
Torso length is one of the biggest factors in hiking comfort. If this setting is wrong, the hip belt and shoulder straps cannot work the way they should. Many modern hiking packs allow torso adjustment, but hikers often skip this step.
A good starting point is simple. The shoulder strap anchor points should sit a little below the top of your shoulders. The hip belt should wrap the top of your hip bones, not your waist and not your stomach. When those two points line up well, the load transfers better.
Pros: A correct torso length reduces shoulder pressure and improves posture right away. Cons: It can take a few small tests to dial in the sweet spot, especially if you are between sizes.
Small changes matter here. Move the setting, load the pack, walk a few minutes, then check again. This one step can change the whole feel of the hike.
Let your hips carry most of the weight
Your hips and legs are better built for load carrying than your shoulders. A well fitted hip belt should take most of the pack weight. If your shoulders feel like they are doing the job alone, the belt is either too loose, too high, too low, or simply shaped wrong for you.
Fasten the hip belt over the top of your hip bones and tighten it until it feels secure, not crushing. Then stand tall and notice what happens. Your shoulders should feel lighter almost at once. On long hikes, many fit guides suggest that most of the load should rest on the hips.
Pros: This is often the fastest way to reduce shoulder pain. It can also improve endurance because your big lower body muscles do more of the work. Cons: If the belt is too tight or shaped badly, you may trade shoulder pain for hip soreness.
Comfort beats force. Aim for firm support, not a painful squeeze.
Adjust shoulder straps, chest strap, and load lifters
Once the hip belt is set, move to the upper straps. Tighten the shoulder straps until they hug the front of your shoulders, but do not let them carry heavy load. Then set the chest strap high enough to keep the harness stable without squeezing your breathing.
Next come the load lifters. These small straps near the top of the shoulders pull the pack closer to your upper back. They should feel snug, not harsh. Many hikers pull them too hard, which can pinch the shoulder area and make pain worse.
Pros: Good strap tuning improves stability, reduces sway, and stops the pack from dragging backward. Cons: Over tightening can create new pressure points and chest tightness.
Think fine tuning, not force. A few small changes often feel better than one hard pull on every strap.
Pack heavy items close and centered
Where the weight sits matters almost as much as how much you carry. Put dense items close to your back and near the middle of the pack. This helps keep the load stable and reduces the pull on your shoulders.
If heavy gear sits far back or low in the pack, the bag acts like a lever. Your upper body leans to manage that pull. Over time, your neck and shoulder muscles do extra work with every step. That extra work often shows up as aching shoulders, tight traps, or arm fatigue.
Pros: Better packing improves comfort without buying anything new. It can also make uphill and downhill walking feel more controlled. Cons: The perfect arrangement may take a few tries, especially if your gear is bulky.
Keep often used light items in outer pockets. Keep the heavy core of the load close to your spine. That simple rule solves a lot.
Cut total load with a simple gear audit
Less weight usually means less strain. Even a well fitted pack gets harder on the shoulders as total load climbs. Before a hike, empty your pack and check every item with one question. Will I truly use this today or tonight?
Start with duplicate clothing, extra water beyond your real need, heavy containers, and comfort items that add more weight than value. Then look at the biggest pieces first. Shelter, sleep system, and spare layers often decide how heavy the pack feels.
Pros: Lighter loads reduce fatigue, improve balance, and make fit problems easier to manage. Cons: Going too light can backfire if you remove safety gear, weather layers, or enough food and water.
Be smart, not extreme. Cut dead weight, not useful gear. A safer and simpler pack usually feels better on the shoulders and everywhere else.
Use trekking poles and better walking form
Trekking poles can help many hikers reduce overall strain, especially on long descents. They improve balance, share effort across the body, and can lower the pounding that builds during downhill miles. Better balance also means fewer sudden shoulder tugs from a shifting pack.
Your walking form matters too. Keep your chest relaxed, eyes forward, and steps short on climbs and descents. A slight forward lean from the ankles can feel more natural than bending from the waist. If you hunch hard, your shoulders tighten and your breathing gets shallow.
Pros: Poles can improve rhythm, reduce lower body stress, and make rough ground feel safer. Cons: Some hikers tense their shoulders while using poles, which defeats the purpose.
Use a light grip. Let the poles support movement, not create more upper body tension.
Strengthen your upper back, core, and hips
A strong body carries a pack with less struggle. You do not need a long gym routine. You need a few basic moves that build the muscles that support hiking posture. Focus on rows, carries, planks, glute bridges, split squats, and dead bugs.
Strong hips and core help the pelvis stay steady. That reduces sway and stops the shoulders from trying to control every step. Strong upper back muscles also support better strap contact and keep your chest from collapsing forward under load.
Pros: Strength work improves hiking comfort, pack control, and recovery over time. Cons: Results are not instant, and poor form in training can create its own soreness.
Two short sessions a week can help. Start light, move well, and build slowly. The goal is support and control, not heavy lifting for its own sake.
Warm up before hiking and stretch after
Cold muscles and stiff joints do not love a loaded pack. A short warm up before you start hiking can reduce early tightness. Try arm circles, band pull aparts, bodyweight squats, calf raises, and a few easy lunges. Then walk easy for the first ten minutes before you push the pace.
After the hike, spend a few minutes opening the chest, moving the upper back, and stretching the hips and calves. If your chest feels tight, your shoulders often roll forward. If your hips are stiff, your upper body may compensate.
Pros: Warm ups and cool downs are simple, free, and easy to repeat. They also help you notice small pain signs early. Cons: Stretching alone will not fix a badly fitted pack or a load that is too heavy.
Use mobility as support, not as the whole solution.
Change settings during the hike and rest early
A pack setup that feels good at mile one may feel different at mile eight. Sweat, fatigue, terrain, and body swelling can change how the load sits. Smart hikers make small strap changes during the day instead of waiting for pain to become severe.
Try this method. When your shoulders feel loaded, tighten the hip belt a little and ease the shoulder straps slightly. Later, if your hips feel sore, reverse the balance for a short stretch. Take the pack off during breaks. Roll your shoulders, breathe deeply, and let the skin and muscles recover.
Pros: Small trail adjustments can stop mild discomfort from turning into lasting pain. Cons: Too much random fiddling can make fit worse if you do not know what each strap does.
Adjust with a purpose. Change one thing, walk a minute, and notice the result.
Know the red flags that need medical help
Some shoulder pain is a fit problem. Some is a health problem that hiking exposes. Pay attention if the pain is sharp, burning, or shooting down the arm. Numbness, tingling, weakness, or loss of grip strength can point to nerve pressure rather than simple muscle fatigue.
You should also take pain seriously if it lasts for days after the hike, wakes you at night, or keeps getting worse even with a lighter load and better fit. In those cases, rest alone may not be enough. A sports doctor or physical therapist can help find the real cause.
Pros: Early care can prevent a small issue from becoming a long recovery. Cons: Some hikers wait too long because they assume all trail pain is normal.
Normal effort is one thing. Lingering pain is another. Listen early and act early.
FAQs
Should my shoulder straps carry much weight?
No. They should hold the pack close to your body, but most of the load should rest on your hips. If your shoulders feel crushed, your hip belt or torso setting likely needs work.
How tight should a hiking hip belt feel?
It should feel firm and secure over the top of your hip bones. It should not pinch, block breathing, or create sharp pressure.
Do trekking poles really help with shoulder pain?
They can help by improving balance and reducing total strain, especially on descents. They work best when you use a light grip and keep your shoulders relaxed.
What is the fastest fix for shoulder pain on the trail?
Start by checking the hip belt, loosening the shoulder straps slightly, and moving heavy gear closer to your back. Then take a short break and reset the pack before pain builds.
When should I stop hiking and get checked?
Stop and get help if you feel numbness, tingling, weakness, sharp pain, or pain that stays for days after the hike. Those signs need more than a strap adjustment.

Hi, I’m Luna Beck — the founder and voice behind Urban Pack Vault. I’m passionate about helping people find bags that perfectly match their lifestyle. From backpacks to travel luggage, I research, review, and recommend so you never have to second-guess your next purchase.