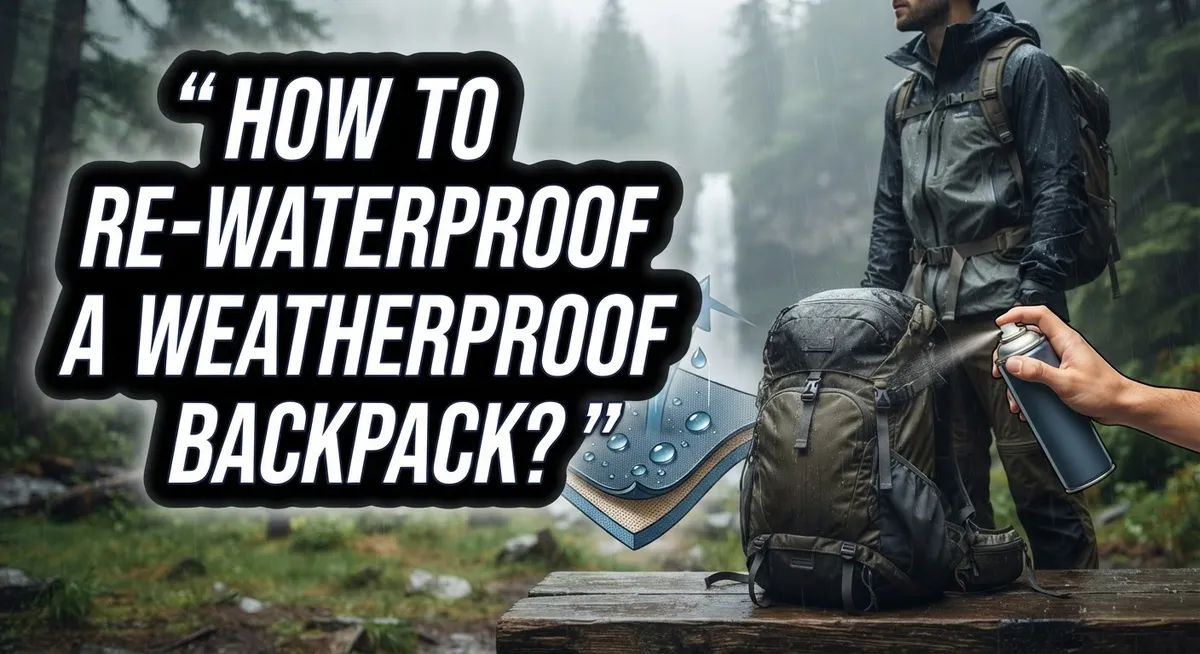
How To Re-Waterproof A Weatherproof Backpack?
Your weatherproof backpack once shrugged off rain like a champ. Now water seeps in during storms. This happens to every bag over time.
Weatherproof does not mean waterproof forever. The protective coating on your backpack wears down. Rain, sun, and daily use break it down slowly.
The good news? You can restore that protection yourself. No need to buy a new bag.
This guide shows you exactly how to re-waterproof your backpack. We cover cleaning your bag properly first. Clean fabric absorbs treatments much better.
In a Nutshell
- Clean first, treat second. Dirt and oils block the new waterproof coating. Always wash your backpack before you apply anything.
- DWR spray is your best friend. It restores the outer fabric’s ability to repel water. Apply it evenly and let it dry fully.
- Seams need special attention. Weatherproof fabric can still leak at the stitching. Seal these spots with a seam sealer for real protection.
- Zippers are sneaky leak points. Treat them separately with a wax based zipper lubricant or protectant. This keeps water from sneaking through the teeth.
- Layer your protection. Combine spray, liners, and rain covers for the best results. No single method covers every weather situation.
- Don’t forget the inside. A pack liner or dry bags keep your gear safe even if water gets through the outer layer.
- Reapply often. DWR coatings wear off with use. Refresh them every few months to keep your backpack ready for any storm.
Understanding Weatherproof vs. Waterproof: Why Re-Waterproofing Matters
Your weatherproof backpack and a truly waterproof one are not the same thing. Understanding this difference is the first step to protecting your gear properly.
Weatherproof means water resistant, not water proof. A weatherproof backpack sheds light rain and moisture. It handles typical outdoor conditions well. However, it will eventually fail during heavy downpours, prolonged exposure, or when water pressure increases. The coating degrades over time from UV rays, dirt, and regular use.
Waterproof means completely sealed against water. A fully waterproof backpack blocks water entirely. This requires multiple layers of protection working together. Your weatherproof pack needs reinforcement to reach this level.
Why does this matter? Most backpacks arrive with a basic water resistant coating. This coating is not permanent. After months of hiking, camping, or commuting, the protective layer wears thin. Rain starts finding its way inside. Your electronics, documents, and clothes get wet.
Re-waterproofing restores and enhances this protection. You add new coatings, seal weak points, and create internal barriers. This three part approach works far better than relying on the original coating alone.
The layered method is your best defense. You treat the outer fabric with a protective spray. You seal every seam and zipper where water sneaks through. You add an internal liner or use dry bags for your belongings.
This combination transforms your weatherproof backpack into something much more reliable. A single treatment is not enough. Water finds gaps in single layer defenses. Multiple barriers catch water before it reaches your gear.
Start by recognizing that your backpack needs help. It cannot protect your belongings alone anymore. With the right approach, you can restore its rain fighting ability completely.
What You’ll Need Before You Start
Before you start re-waterproofing your backpack, gather the right supplies. You’ll need several items to do the job properly.
DWR spray is your main tool. This coating restores water repellency to fabric. Get a spray designed for outdoor gear, not furniture or clothing. You’ll apply this to the outer surface of your backpack.
Seam sealer comes next. This liquid product fills gaps where water sneaks through stitching. Seams are where most leaks happen on weatherproof bags. You apply it along every seam line on the outside.
Zipper treatment prevents water from entering at zippers. A wax based lubricant or dedicated zipper protectant works well. Zippers are small but critical leak points that people often forget.
For internal protection, get a pack liner or several dry bags. A pack liner is a waterproof sheet that sits inside your backpack. Dry bags are individual pouches for protecting specific items. Either method keeps your gear safe if water penetrates the outer layer.
A rain cover adds an extra defensive layer. This fits over your entire backpack like a sleeve. It shields the main body and zippers from direct rain and snow.
You’ll also need basic cleaning supplies. Mild soap, a soft brush, and clean water remove dirt and oils. These substances block waterproof coatings from working properly.
Finally, have clean rags or towels ready. You’ll use these to dry your backpack after cleaning and between application steps. Moisture interferes with spray and sealer bonding.
Gather everything before starting. This prevents interruptions and ensures even application across your backpack.
Step 1: Cleaning Your Backpack Properly
Cleaning your backpack properly is the foundation for successful re-waterproofing. Dirt, dust, and oils create a barrier that prevents new waterproof coatings from bonding to the fabric. Your backpack won’t regain its water resistance if you skip this step.
Start by removing all contents from your backpack. Check every pocket and compartment to ensure nothing remains inside. This gives you full access to all surfaces that need cleaning.
Use a soft brush or old toothbrush to gently scrub the exterior fabric. Pay special attention to seams, corners, and zipper areas where dirt accumulates. These spots trap moisture and become leak points if left dirty.
Wipe down the entire backpack with a damp cloth. Use cool or lukewarm water only. Hot water can damage some fabric coatings and weaken seams.
For stubborn stains or greasy spots, use a mild soap solution. Mix a small amount of gentle dish soap with water. Apply this mixture with a cloth and scrub lightly. Rinse thoroughly with clean water until no soap residue remains.
Pay extra attention to the interior. Dust and debris inside can mix with moisture and create mold. Use a damp cloth to wipe all interior surfaces, pockets, and corners.
Allow your backpack to dry completely before moving forward. Place it in a well ventilated area away from direct sunlight or heat sources. Drying typically takes 24 to 48 hours depending on humidity levels.
Never use a dryer or hairdryer on your backpack. High heat damages waterproof coatings and can melt synthetic fabrics. A clean, dry backpack is ready for the next re-waterproofing steps.
Step 2: Applying DWR Spray to the Outer Fabric
Now that your backpack is clean and dry, you’re ready to apply DWR spray. This step restores the water repellent coating on your fabric’s surface.
Read the spray instructions first. Different products have different application methods. Some require shaking, others need specific distances from the fabric. Follow these guidelines exactly for best results.
Find a well ventilated area outdoors or in a garage. DWR spray releases fumes, so you need good air flow. Lay your backpack flat on a clean surface or hang it from a clothesline.
Start spraying the main body of your backpack. Hold the can 6 to 8 inches away from the fabric. Use smooth, even strokes moving in one direction. Avoid spraying too much in one spot, which can create pooling or staining.
Pay special attention to high wear areas. These include the bottom, shoulder straps, and top flap. These spots receive the most contact and exposure to moisture. Give them extra coverage.
Spray the front pockets and side compartments thoroughly. Water often enters through these openings, so protection here matters significantly.
Let the spray dry completely. Most products need 24 hours of drying time before your backpack is ready to use. Don’t rush this step. The coating needs time to bond with the fabric fibers.
After drying, test the coating by sprinkling water on the fabric. The water should bead up and roll off. If water soaks in instead, apply another coat and allow it to dry again.
Remember that DWR coating degrades over time with use and washing. You’ll need to reapply this spray every 6 to 12 months depending on how often you use your backpack.
Step 3: Sealing Seams and Zippers Against Leaks
Seams and zippers are where most backpacks leak. Water finds these weak points even on weatherproof bags. You need to seal them properly to stop leaks before they start.
Seam sealing is critical. Most weatherproof backpacks have seams that aren’t fully sealed at the factory. Water travels along threads and needle holes. You can apply seam sealer products along the interior seams where fabric panels connect. Work slowly and carefully along each seam line. Let the sealer dry completely according to product instructions. Pay special attention to the bottom seams and side panels. These areas take the most stress and water exposure.
Zipper protection prevents water entry. Zippers are notorious leak points because water slides down the teeth. Apply zipper treatment products along the entire zipper track on both sides. You can also use a thin line of seam sealer around the zipper area. Make sure the slider moves smoothly after application. Test it several times to confirm it still works properly.
Consider adding a zipper cover. Some people use waterproof tape or adhesive-backed covers over zipper tracks for extra protection. This creates a physical barrier that water must travel around.
Work in a dry environment. Apply seam sealers and zipper treatments indoors where humidity won’t interfere with drying. Moisture in the air can prevent proper curing.
Allow proper drying time. Don’t rush this step. Follow the manufacturer’s drying recommendations exactly. Most products need 24 hours to cure fully. Your backpack will be much more reliable once these vulnerable points are sealed properly.
Step 4: Adding Internal and External Protection Layers
Now that your seams and zippers are sealed, it’s time to add protection layers inside and outside your backpack. These layers work together to stop water from reaching your gear.
Internal protection starts with a pack liner. A pack liner is a waterproof bag that sits inside your backpack. It creates a barrier between your belongings and the backpack walls. Pack liners work best because they protect everything at once. You can use flexible materials that stretch to fit your backpack shape. Make sure the liner covers the bottom and sides completely.
Dry bags offer another internal option. These smaller waterproof bags hold individual items like electronics, documents, or clothing. You can place dry bags inside your pack liner for extra security. This method works well if you want to organize gear by type. Dry bags also let you access items without opening the entire pack liner.
For budget conscious hikers, a standard trash bag works in emergencies. Just place your gear inside before putting it in the backpack. This isn’t ideal for regular use, but it helps during heavy rain or snow.
External protection means adding a rain cover. A rain cover sits on top of your backpack and shields it from above. Rain covers are especially helpful for the top flap and upper compartments where water pools. Combine the rain cover with your internal liners for maximum protection.
The key is layering your defenses. Don’t rely on just one method. Use internal liners plus a rain cover together. This combination stops water at multiple points. Your gear stays dry even when conditions get wet and messy.
Common Mistakes to Avoid When Re-Waterproofing
Many people make simple mistakes when re-waterproofing their backpacks. Understanding these errors helps you avoid wasting time and money on ineffective methods.
The biggest mistake is relying on spray alone. Many backpack owners apply waterproofing spray and assume their pack is fully protected. This approach fails because spray only treats the outer fabric. Water still seeps through unsealed seams and zippers underneath. You need multiple layers of defense working together.
Another common error is skipping zipper protection entirely. People focus on spraying the main body but forget that zippers are weak points. Water runs down the zipper teeth and enters your pack. Protecting zippers requires deliberate action, not just spray coverage.
Some people neglect internal barriers. They waterproof the outside but leave the inside unprotected. If water does penetrate your outer defenses, your gear gets wet. Pack liners or dry bags catch water that makes it past your first layer.
Not reapplying treatments causes problems later. DWR coatings degrade with use and washing. Backpacks that worked perfectly for months suddenly leak. You need to refresh the spray periodically throughout the year.
Rushing the drying process is another mistake. People apply sealers or spray, then immediately pack their backpack. Incomplete drying means the coating doesn’t bond properly to fabric. Always allow full drying time as instructed.
Finally, people often ignore the difference between weatherproof and waterproof. Your backpack being weatherproof doesn’t mean it’s fully waterproof. Weatherproof provides basic protection, but serious water exposure requires active re-waterproofing steps. Combine spray, sealing, and internal liners for real protection.
Maintaining Waterproofing Over Time
Your backpack’s waterproofing won’t last forever. The coating breaks down from regular use, sun exposure, and washing. You need to maintain it properly to keep water out during future trips.
Check your backpack every few months if you use it frequently. Look for signs that the DWR coating is failing. Water should bead up on the fabric surface. If water soaks in instead, the coating has degraded and needs reapplication.
Reapply DWR spray once or twice per year. The frequency depends on how often you use your backpack. Heavy users should treat it more frequently. Light users might only need annual treatment. Follow the product instructions for best results.
Clean your backpack before reapplying any treatment. Dirt and grime block the coating from bonding properly to the fabric. Use mild soap and water. Let it dry completely before spraying. This ensures the new coating adheres well.
Inspect seams and zippers regularly too. Even sealed seams can weaken over time. Look for signs of water penetration during or after rain. If you notice leaks, reseal those specific areas rather than treating the entire backpack.
Store your backpack in a cool, dry place between trips. Extreme heat and humidity accelerate coating breakdown. Avoid leaving it in direct sunlight for extended periods.
Don’t wait until your backpack fails completely. Preventive maintenance is much easier than emergency repairs during a trip. Regular inspections catch problems early. Reapplying treatments before they fully degrade keeps your gear protected. This simple routine keeps your backpack performing well for years.
Final Thoughts
Re-waterproofing your backpack does not need to feel like a big chore. Once you understand the basic steps, the process becomes quick and simple.
Remember that weatherproof and waterproof are not the same thing. Your backpack needs extra care to handle heavy rain or snow.
Start with a clean surface. Then apply a DWR spray to renew the outer coating. This step alone makes a real difference.
Seams and zippers deserve special attention. These spots let water sneak in even when the fabric looks fine. A quality seam sealer closes these small gaps for good.
Layering your protection is the smartest approach. Combine external sprays with internal liners or dry bags. This combination keeps your gear safe even during unexpected storms.
Think of your backpack like a system with multiple defenses. Each layer catches what the other might miss. This teamwork between methods gives you real peace of mind on the trail.
Regular maintenance keeps everything working well. Check your gear often, especially before big trips. Small issues become easy fixes when caught early.
Weather conditions change fast outdoors. Your gear should stay ready for anything nature throws your way. A little effort now saves you from bigger problems later.
Your backpack protects the things you value most. Electronics, documents, and clothes all need shelter from moisture. Taking time to re-waterproof shows care for both your gear and your comfort.
With the right steps, any weatherproof backpack can perform like new. Clean it, seal it, layer it, and check it often. This simple routine keeps you dry and confident on every adventure.
Frequently Asked Questions
How often should I reapply waterproofing treatment to my backpack?
Reapply DWR spray once or twice per year if you use your backpack regularly. The coating gradually degrades with wear, sun exposure, and washing. If you use your backpack only occasionally, you may only need to treat it every 18 to 24 months.
Check your backpack every few months to see how water beads on the fabric. If water soaks in instead of beading up, it’s time to reapply. Always clean your backpack thoroughly before reapplying any treatment.
Can I use a weatherproof backpack in heavy rain without extra protection?
No. Weatherproof and waterproof are not the same thing. Weatherproof means your backpack resists light moisture and wind. Heavy rain will eventually find its way through seams, zippers, and fabric weave.
For heavy rain or snow, use multiple layers of protection. Add a rain cover on top. Place a pack liner or dry bags inside. This combination gives you real security for your gear. Don’t rely on the backpack’s weatherproof coating alone.
What’s the best way to protect my backpack’s zippers from water?
Zippers are common leak points. Apply waterproofing spray directly to the zipper teeth and slider. You can also rub a waterproof wax stick along the zipper track. This creates a barrier that water cannot easily penetrate.
Check zippers regularly for damage or misalignment. A stuck or partially open zipper lets water straight through. Keep zippers clean and free of dirt.
Should I use a pack liner or a rain cover or both?
Use both for maximum protection. A rain cover shields your backpack from above and sides. A pack liner keeps moisture away from your actual gear. Together, they create a two layer defense system.
Pack liners work best with internal organization. Rain covers add weight but provide excellent external protection. This combination ensures your belongings stay dry in serious weather.

Hi, I’m Luna Beck — the founder and voice behind Urban Pack Vault. I’m passionate about helping people find bags that perfectly match their lifestyle. From backpacks to travel luggage, I research, review, and recommend so you never have to second-guess your next purchase.