Why Is My Backpack Rain Cover Not Staying On?
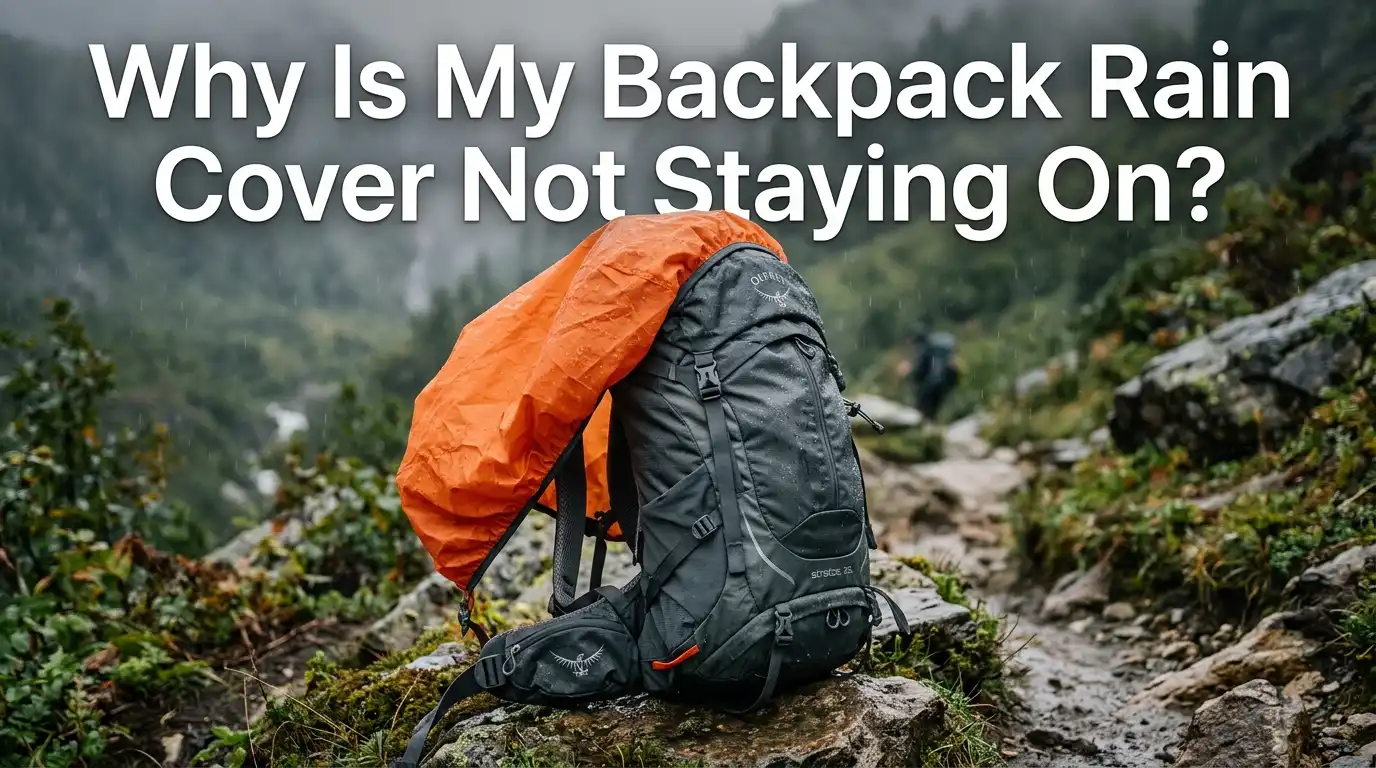
Rain hits your hike, and you reach for your trusty pack cover. You stretch it over your backpack, tighten the cord, and feel ready for anything.
Then a gust of wind lifts it like a kite, or it slowly slides off your shoulder straps as you walk. Sound familiar? A loose rain cover is one of the most frustrating gear problems hikers, commuters, and travelers face. It leaks, it flaps, and it can even fly away completely.
The good news is that this problem has clear, fixable causes. Most of the time, the cover is the wrong size, the elastic has worn out, or the cover is missing a few simple attachment points.
Key Takeaways
- Wrong size is the top cause of a loose rain cover. A cover rated for 30 to 50 liters will slide right off a 70 liter pack, and a cover that is too big will flap and catch wind. Always match the cover liters to your pack volume.
- Stretched or broken elastic stops the cover from gripping your pack. You can replace the shock cord in about five minutes using a safety pin and a fresh piece of bungee cord from any craft store.
- Adding attachment points helps a lot. Tie the cover to your pack with a short piece of paracord, a carabiner, or a buckle clip. This stops the cover from flying off in strong wind.
- Threading the cover under shoulder straps and the sternum strap creates anchor points the wind cannot lift. This single trick fixes most slipping problems instantly.
- A pack liner works as a backup. Even if your cover fails, a trash compactor bag inside your pack keeps your gear dry and gives you peace of mind.
- Wind, gear bulk, and wet fabric all change how the cover fits. Adjust the drawcord every hour or so during heavy weather to keep things tight.
Your Rain Cover Is the Wrong Size for Your Pack
The most common reason a rain cover slips off is a simple size mismatch. Rain covers come in liter ranges, like 20 to 35 liters or 50 to 80 liters. If your pack sits at the edge of that range, the cover will not grip properly. A cover that is too small stretches thin and pops off when you move. A cover that is too big bunches up and acts like a sail.
Check your pack volume first. Look at the tag inside your pack or the manufacturer’s website. Then pick a cover that lists your liter size in the middle of its range, not at the edge.
If you cannot return the wrong size cover, you can still make it work. Add a few stitches at the corners to tighten a loose cover, or cut a small slit and add a wider elastic band to a tight one.
Pros: Buying the right size is the cleanest fix and lasts for years.
Cons: You may need to buy a new cover, which costs money, and finding the exact size for odd shaped packs can take time.
The Elastic Cord Has Stretched or Worn Out
Rain covers use a shock cord, also called a bungee, stitched around the opening. Over time, this cord loses its stretch. Sunlight, sweat, and repeated stretching all weaken the elastic. Once it goes slack, the cover simply will not grip your pack anymore.
You can test the cord in seconds. Pull the cover taut and let go. If the cord does not snap back tight, it needs replacing. This is one of the easiest gear repairs you can do at home.
To replace the cord, find the small plastic tube where the cord enters the hem. Cut the knot, pull the old cord out, and use a safety pin to thread a new piece of 3mm shock cord through the same channel. Tie a fresh knot and add the cord lock back on.
Pros: This repair costs under five dollars and takes about ten minutes.
Cons: You need a safety pin and a steady hand, and very old covers may have other worn spots that fail soon after.
The Cover Has No Attachment Points to Your Pack
Many cheap rain covers are just stretchy fabric hoods with no clips, loops, or straps. Without a physical link to your pack, only friction holds them in place. A strong gust or a quick bend can break that friction and send the cover flying.
Better covers come with built in attachment loops and a clip that hooks under the bottom of your pack. If your cover lacks these, you can add them yourself in minutes.
Sew a small loop of webbing or grosgrain ribbon to each corner of the cover. Then use a short piece of paracord or a mini carabiner to clip the loop to your pack’s compression straps or daisy chain. Even one anchor point at the bottom makes a huge difference.
Pros: Adding clips costs almost nothing and prevents total loss of the cover in wind.
Cons: Sewing through coated fabric can leak unless you seal the holes with seam grip, and the extra clips add a small bit of weight.
You Are Not Using the Shoulder Strap Tuck Method
Here is a trick most beginners miss. Many rain covers are designed to slip behind your shoulder straps, not over them. This holds the top edge of the cover tight against your back and stops wind from lifting it.
To do this, take the cover off your pack first. Then slide the top edge of the cover between your back and the shoulder strap mounts. Pull it down behind both straps so the cover hugs the top of your pack tightly.
The sternum strap and hip belt also help. Tuck the side edges of the cover under these straps as well. This creates four anchor points without adding any extra gear. Your cover will stay flat against your pack even in strong gusts.
Pros: This method uses no extra equipment and works with almost any cover.
Cons: You have to take the pack off to set it up correctly, and very tight covers may not have enough slack to tuck.
Wind Is Lifting the Cover Like a Parachute
Even a perfectly sized cover can fail in strong wind. A loose pocket of air under the cover acts like a small parachute. The wind catches it from below, lifts it up, and either tears it or peels it back over the top of your pack.
The fix is to push out the air before you tighten the drawcord. Press the cover flat against your pack with your palms, then cinch the cord tight at the bottom. This removes the air pocket and reduces wind drag.
For very windy days, add a chest strap or waist belt over the outside of the cover. A spare piece of paracord tied around the middle of your pack also works. The goal is to compress the cover against the pack body so wind has nothing to grab.
Pros: Adding compression takes seconds and uses gear you already carry.
Cons: Extra straps can scuff the cover fabric over time, and accessing pack pockets becomes harder.
Your Pack Has Bulky Gear Strapped to the Outside
Sleeping pads, tents, and trekking poles strapped to the outside of your pack change its shape. A rain cover sized for the bag alone will not fit over the added gear. The cover slips off the bumps or rips at the seams.
You have two choices here. Move the bulky gear inside the pack during rain, or buy a cover one size larger than your pack volume. Moving gear inside is the better option for staying dry.
If you must keep gear outside, drape the cover over the whole bundle and tie it down with extra cord. Pay special attention to sharp corners like tent pole tips, which can puncture the cover. Wrap these tips in a sock or cloth before pulling the cover over them.
Pros: Moving gear inside protects it better and keeps your pack balanced.
Cons: Inside space is limited, and wet tents or muddy pads should not go next to dry clothes.
The Cover Slides Down When Wet
Wet fabric gets slippery. A cover that fit fine when dry can slowly creep down your pack as rain soaks the outside. Combine this with the weight of pooled water, and the cover ends up sagging at your hips within an hour.
Shake off pooled water every fifteen to twenty minutes. Most covers have a small drain hole or seam where water collects. Lift the bottom edge and let the water run out. This keeps the cover light and tight.
You can also retighten the drawcord as the cover settles. Many covers loosen on their own as the fabric stretches when wet. A quick tug on the cord lock fixes this. Some hikers add a second elastic loop around the middle of the pack to hold the cover in place against gravity.
Pros: Regular adjustments keep the cover working all day with no extra gear.
Cons: Stopping to adjust slows you down, and pooled water can soak through cheaper fabrics.
The Drawcord Lock Is Broken or Slipping
The small plastic toggle on the drawcord is called a cord lock. When the spring inside breaks, the cord slides freely and the cover loosens on its own. You tighten it, walk a few steps, and it sags again.
Check the cord lock by pinching the button and pulling the cord. If the cord moves without you pressing the button, the spring is dead. Replace the cord lock with a fresh one from any outdoor store or fabric shop.
To swap it, cut the knot at the end of the cord, slide off the old lock, and slide on a new one. Retie the knot tight so it cannot pull back through. You can also tie a simple overhand knot in the cord itself as a backup stopper.
Pros: Cord locks cost under a dollar and last for years.
Cons: You need to find the right size cord lock for your shock cord diameter.
You Did Not Hook the Bottom Clip Under the Pack
Many rain covers come with a small clip on a stretchy cord at the bottom corner. This clip is meant to hook under your pack and pull the cover down tight. Most users miss this feature completely.
Look at your cover when it is off the pack. Find the small clip or buckle hanging from a corner. This is the anchor that holds the cover against the bottom of your pack.
When you put the cover on, route this clip under the pack between the bottom and your lumbar pad. Hook it onto the opposite corner of the cover, or onto a webbing loop on your pack. The cover should now sit snug against the pack with no flapping at the bottom.
Pros: Using the built in clip is free and adds no weight.
Cons: The clip can scratch your pack fabric, and it may be hard to reach with a fully loaded bag.
Your Pack Shape Is Unusual or Has Side Pockets
Some packs have wide hip wings, tall side pockets, or odd top lids. Standard rain covers are shaped for typical pack profiles, so unusual shapes leave gaps. The cover bridges over the bulges and slips off the narrow parts.
For packs with big side pockets, look for a cover labeled as wide or expandable. A square cut cover fits better than a tapered one for boxy packs. Some brands sell covers specifically for hip pack designs.
If a perfect cover does not exist for your bag, a poncho works as a backup. A hiking poncho is large enough to cover both you and your pack, and it tucks under your arms so wind cannot lift it. This single piece of gear solves the shape problem entirely.
Pros: Ponchos cover you and your pack at once and work for any pack shape.
Cons: Ponchos flap in wind too, and they can get hot on warm rainy days.
You Need to Use a Pack Liner Instead
Sometimes the rain cover fight is not worth it. A pack liner sits inside your bag and waterproofs your gear from the inside out. No wind can blow it off, and it costs almost nothing.
A heavy duty trash compactor bag is the classic choice. Slide it inside your pack, load your gear inside the bag, and twist the top closed. Even if rain soaks through your pack fabric, your gear stays bone dry.
You can use a pack liner alone or together with a rain cover. The combo works best in heavy rain. The cover keeps the pack fabric from soaking up water weight, while the liner protects your gear if the cover fails or leaks.
Pros: Liners are cheap, light, and almost foolproof.
Cons: Your pack fabric still gets wet and heavy, and grabbing items mid hike means opening the liner each time.
How to Make Your Own Better Rain Cover
If store bought covers keep failing you, a homemade cover can fit your exact pack better. You can sew one in an afternoon with silnylon, ripstop nylon, or even a tough trash bag.
Measure your pack height, width, and depth. Cut the fabric about four inches larger than your pack on all sides. Hem the edge with a channel for shock cord, thread the cord through, and add a cord lock. Sew small webbing loops at each corner for attachment points.
For a quick no sew version, cut leg holes in a heavy duty trash bag and pull it over your pack with the straps poking through. Tape the seams with duct tape for extra waterproofing. It looks ugly, but it works.
Pros: A custom cover fits perfectly and costs less than a store version.
Cons: You need basic sewing skills, and homemade seams may leak without seam sealer.
FAQs
Why does my rain cover blow off even when it is the right size?
Wind catches the air pocket between the cover and your pack. Press the cover flat against the pack before tightening the drawcord, and tuck the edges under your shoulder and hip straps. Adding a clip or paracord tie at the bottom also helps in strong gusts.
Can I use a shower cap or trash bag instead of a real rain cover?
Yes, both work in a pinch. A heavy duty trash bag with leg holes cut out covers your pack well for short trips. Shower caps are too small for most packs but can protect smaller daypacks. These options are short term fixes, not long term gear.
How tight should the drawcord on my rain cover be?
The cord should pull the cover snug against the pack with no loose flaps. You should not see any gaps around the shoulder straps or hip belt. If the cord is fully tight and the cover still sags, the elastic is worn out and needs replacement.
Do rain covers work in heavy rain or just drizzle?
Quality rain covers handle heavy rain for several hours. Cheap covers leak at the seams and through the back panel where they do not cover the pack. For all day downpours, use a pack liner inside your bag as a backup.
How do I keep my rain cover on at high speeds on a bike or motorcycle?
Use a cover with built in clips and add extra paracord ties around the pack. Tuck the cover under your shoulder straps and add a compression strap over the outside. For very high speeds, a waterproof pack liner is safer than relying on a cover alone.
Can I wash my rain cover, and will that ruin the waterproofing?
Yes, you can hand wash it with mild soap and cool water. Avoid the washing machine, as the agitator can damage the coating. Rinse it well, air dry it, and apply a fresh DWR spray every season to keep water beading off the surface.

Hi, I’m Luna Beck — the founder and voice behind Urban Pack Vault. I’m passionate about helping people find bags that perfectly match their lifestyle. From backpacks to travel luggage, I research, review, and recommend so you never have to second-guess your next purchase.