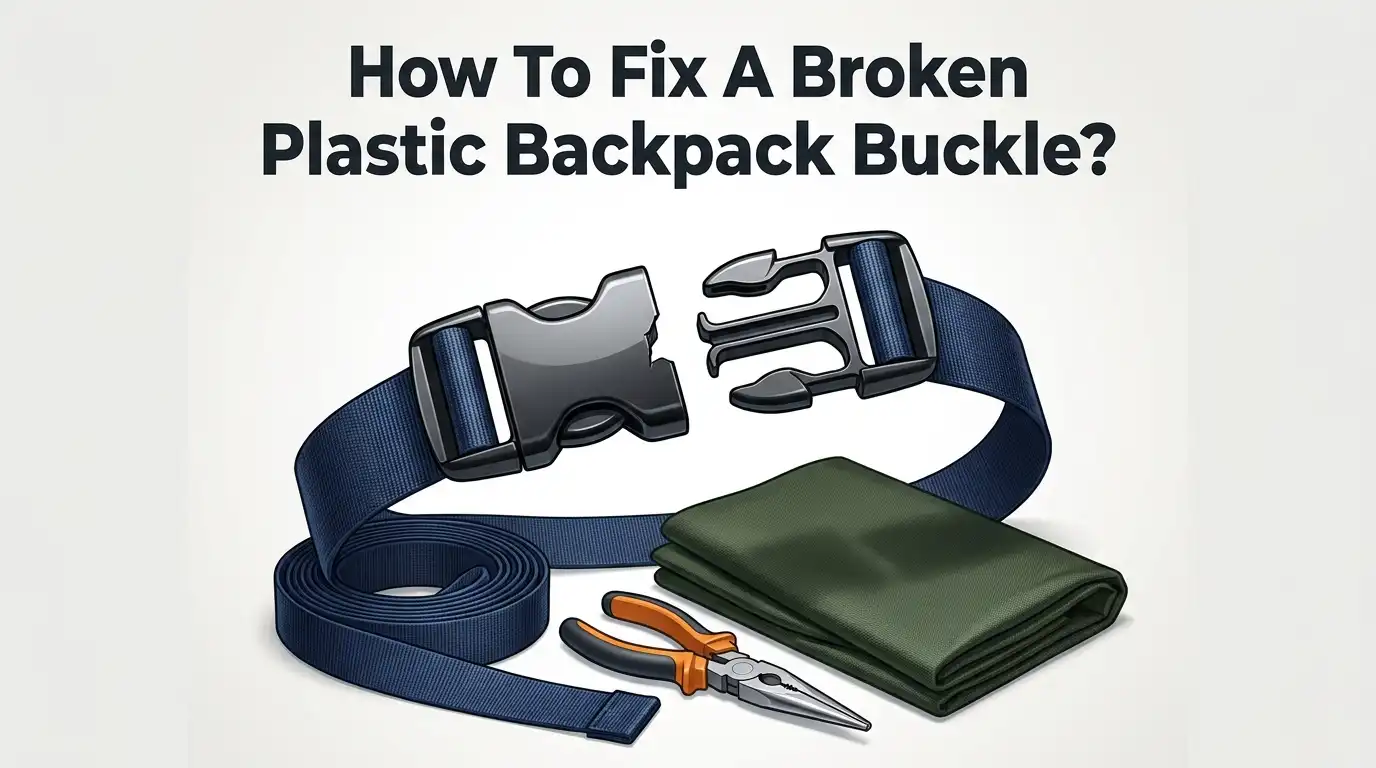
How To Fix A Broken Plastic Backpack Buckle?
A broken backpack buckle can stop your whole trip before it even starts. Whether the clip snapped on a trail or the adjustment strap gave out at the worst moment, this is a fixable problem.
The good news? You do not need to buy a new backpack or visit a repair shop. Most plastic buckle repairs can be done at home with basic tools and a little patience.
Knowing the right method makes all the difference. There are two main approaches: replacing the buckle entirely or bonding the broken pieces back together. Each method works best in different situations.
In a Nutshell
- A broken plastic buckle does not mean your backpack is ruined. Most breaks are fixable with basic tools and a little patience.
- There are two main repair methods: replacing the buckle by removing old stitching and re-stitching a new one in place, or bonding the broken piece back together using adhesive with mechanical reinforcement.
- Super glue alone is not enough. For a stronger bond, melt a metal wire or paper clip across the glued seam to lock the joint in place.
- If you are on a trail with no tools, a temporary field fix is possible using wire forming or makeshift binding to hold the buckle together until you get home.
- The most common mistake is trying to repair the buckle without removing the old stitching first. Always take the webbing out cleanly before starting.
- Knowing which method suits your situation saves time and keeps your backpack working longer. A sew-in replacement lasts longer, while adhesive repairs work best for quick fixes.
Understanding How Plastic Backpack Buckles Work
Plastic backpack buckles work through a simple mechanical system. The buckle has two main parts: a male connector and a female receiver. When you push them together, they lock into place through friction and a small locking mechanism.
Most buckles sit on webbing straps. Stitching holds the buckle firmly to the fabric underneath. This stitching takes all the stress when you pull or adjust the strap. Over time, the threads wear out or the plastic itself cracks under repeated bending.
Understanding the stress points helps you fix problems better. The adjustment straps on your shoulder take the most damage. These straps move constantly as you wear your backpack. The connection point between the buckle and webbing experiences constant flexing.
The plastic material matters too. Most backpack buckles use polycarbonate or nylon plastic. These materials become brittle over time, especially in cold weather. Heat and UV light also weaken the plastic gradually.
When a buckle breaks, it usually fails in one of two ways. The plastic piece cracks or snaps off completely. Or the stitching tears away from the webbing, leaving the buckle loose and dangling.
Knowing how buckles fail tells you which repair method works best. If the stitching failed but the buckle stayed intact, you just need to re stitch it. If the plastic cracked, you have two choices: glue the pieces back together or replace the whole buckle.
The webbing itself rarely tears when a buckle fails. This is good news because it means you can reuse the same strap attachment point. You simply remove the old buckle and attach a new one or repair the existing one in the same spot.
Tools and Materials You Will Need
Before you start fixing your broken plastic backpack buckle, gather the right tools and materials. Having everything ready makes the repair smooth and quick.
Thread ripper or small scissors work best for removing old stitching. A thread ripper cuts stitches without damaging the webbing underneath. Small scissors work too if you go slowly and carefully.
You will need sturdy needle and thread for re stitching the new buckle. Use thread that matches your backpack color if possible. Thicker thread holds better than thin thread. Nylon or polyester thread works well for outdoor gear.
Super glue or plastic adhesive helps bond broken pieces together. Keep some on hand for quick fixes. The adhesive alone is not strong enough, so you will need reinforcement too.
A heated paper clip or thin wire reinforces glued seams. This creates a mechanical bond that holds longer than adhesive by itself. You need a lighter or small heat source to warm the metal gently.
Replacement buckles come in different sizes. Measure your broken buckle before getting a new one. Take a photo of the old buckle to match the style and size accurately.
Seam sealant or waterproof tape protects your repair from moisture. This keeps water from seeping into glued joints. Optional but helpful for backpacks used in wet conditions.
A small cutting mat or hard surface protects your work area. This gives you a safe place to cut webbing and work with adhesives.
Tweezers or small pliers help you position small pieces during repair. These tools give you better control than using your fingers alone.
Gather these items before starting. Good preparation means fewer frustrations and faster results.
How To Assess the Damage Before You Begin
Before you start any repair, take a close look at what actually broke. This step saves you time and helps you pick the right fix.
First, examine where the buckle attached to the webbing. Look for broken stitching, cracked plastic, or both. Run your fingers along the seam to feel if threads are still holding or completely snapped. A loose buckle with intact stitching needs different treatment than a shattered plastic piece.
Next, check the buckle itself for damage. Does it have a clean break, or is the plastic crushed and splintered? A clean break can sometimes be glued back together. Crushed or cracked plastic usually means replacement works better than repair.
Look at the webbing attachment point too. Sometimes the webbing tears when the buckle fails, or stitching holes enlarge and weaken. This affects how you’ll secure your new or repaired buckle. If the webbing is damaged, you may need to reinforce it before attaching anything.
Test the buckle’s mechanism if it’s still somewhat intact. Does it click or snap properly? Can you move the adjustment bar freely? Understanding what still works tells you if you’re fixing just the attachment or the entire buckle system.
Check both sides of the break. The underside often shows damage you miss at first glance. Look for stress cracks spreading from the break point, which signal deeper structural failure.
Finally, assess how urgently you need it fixed. A completely shattered buckle on your main shoulder strap needs immediate attention. A cracked adjustment buckle on a side pocket can wait for a more careful repair at home.
This quick assessment guides your entire repair process forward.
Step-By-Step: Replacing a Broken Buckle With Stitching
Start by gathering your supplies on a clean, flat surface. You will need a thread ripper or small scissors to cut through the old stitching. Have your replacement buckle ready along with a sturdy needle and thread that matches your backpack color.
Remove the old stitching carefully. Use your thread ripper to cut each stitch holding the broken buckle to the webbing. Work slowly to avoid damaging the webbing itself. Pull away the broken buckle piece once all stitches are removed. Inspect the webbing for any tears or fraying along the attachment area.
Clean the webbing where the new buckle will attach. Wipe away any dirt, debris, or adhesive residue from the old buckle. This ensures your new stitching will hold properly. Allow the webbing to dry completely if you used water to clean it.
Position your replacement buckle correctly. Align it the same way the original buckle sat on the webbing. Make sure the buckle opening faces the right direction for your backpack’s function. Pin or hold the buckle in place before you start stitching.
Thread your needle and begin stitching around the buckle base. Use small, tight stitches to create a strong hold. Sew through all layers of webbing and the buckle attachment points. Make multiple passes over each stitch for extra durability.
Tie off your thread securely on the back side of the webbing. Trim any excess thread with scissors. Test your new buckle by pulling firmly on it. The buckle should not move or wiggle. Your repair is complete when the buckle feels as solid as it was before it broke.
Step-By-Step: Repairing a Cracked Buckle With Adhesive and Reinforcement
When your buckle cracks but the stitching stays intact, adhesive repair with reinforcement works well. This method fixes the plastic piece itself rather than replacing the entire buckle.
Start by cleaning both broken surfaces thoroughly. Remove any dirt, dust, or old adhesive. Let the pieces dry completely before proceeding. A clean surface helps the glue bond much stronger.
Apply super glue to one of the broken surfaces. Use a small amount and press the pieces together firmly. Hold them in place for about two minutes. The glue sets quickly, but pressure helps create a tight seal.
Now reinforce the repair with a heated paper clip or thin wire. This mechanical reinforcement prevents the glue from cracking again under stress. Gently heat the paper clip until it’s warm but not burning hot. Press it across the glued seam to create a bridge that holds both pieces together.
Let the adhesive cure for at least 24 hours before using your backpack. This waiting period ensures the bond reaches full strength. During this time, avoid bending or stressing the repaired buckle.
For extra protection, apply waterproof sealant around the repair. This keeps moisture from weakening the adhesive bond over time. A thin layer around the seam does the job.
Test the buckle gently after curing. If it feels solid and holds securely, your repair succeeded. If the buckle still feels loose, the adhesive bond may not be strong enough. In that case, consider replacing the entire buckle with stitching instead.
This adhesive method works best for small cracks. Major breaks or shattered pieces usually need full buckle replacement for reliable performance.
How To Fix a Broken Buckle in the Field Without Tools
When you’re on the trail and your buckle breaks, you need a fast fix using only what you have available. The good news is that temporary field repairs are absolutely possible without specialized tools.
Start with what’s in your pack. Look for any cordage, paracord, or strong string. You can thread this through the buckle attachment points and tie it securely around the webbing. This creates a temporary hold that keeps your pack stable for the rest of your hike.
If you have a lighter or matches, you can melt the edges of nylon webbing slightly to prevent fraying and create a stronger base. Heat the webbing gently near the break point. This helps the material hold together better when you apply your next step.
A rock or stick can serve as a splint. Place it against the broken buckle and wrap your cordage around both the buckle and the splint multiple times. This distributes pressure away from the break point. Tie it off firmly so it won’t slip.
Duct tape or any strong adhesive tape works as a temporary wrap. Cover the broken area completely, pressing firmly so the tape bonds to itself and the webbing. This holds pieces together until you reach home.
Test your field repair carefully. Tug on it gently to make sure it holds before you put weight on your pack. These temporary fixes typically last long enough to get you back from your trip.
Once home, you should perform a permanent repair using stitching or adhesive with proper reinforcement. Field repairs buy you time but aren’t meant to last forever.
Common Mistakes To Avoid When Repairing Backpack Buckles
Many people rush into repairs without preparing properly, which leads to failed fixes. The biggest mistake is trying to glue or stitch a buckle while dirt and debris remain on the surfaces. Clean both sides thoroughly before you start any repair work.
Another common error is choosing the wrong adhesive for the job. Super glue alone won’t hold plastic buckles under stress. You need reinforcement like a heated paper clip or wire across the joint to create mechanical strength. Adhesive by itself fails quickly on straps that experience constant pulling and movement.
People often skip the removal of old stitching when replacing a buckle. This creates bulk and prevents your new buckle from sitting flat against the webbing. Use a thread ripper to cut each stitch carefully before you attach the replacement buckle.
Rushing the curing time causes repairs to fail mid use. If you use super glue, wait at least 24 hours before putting weight on your backpack. Impatience costs you more time than waiting does.
Many repair attempts fail because the buckle wasn’t positioned correctly. Match the new buckle’s angle and placement to the original one. An incorrectly angled buckle distributes stress unevenly and breaks again quickly.
Don’t skip waterproof protection on adhesive repairs. Moisture seeps into cracks and weakens glue bonds over time. A waterproof sealant around your repair adds months of durability.
Finally, avoid using thread that’s too thin or weak. Match the thread strength to your backpack’s original stitching. Weak thread breaks before the buckle does, defeating your entire repair effort.
How To Test Your Repair for Strength and Durability
Testing your repair ensures it actually works before you rely on your backpack. Start by inspecting the repaired area visually. Look for any gaps, cracks, or loose threads around the buckle. The repair should appear solid and seamless.
Next, perform a gentle pull test. Hold the webbing on both sides of the buckle and pull slowly with moderate force. The buckle should not move, flex, or make cracking sounds. If it does, your repair needs more time to cure or additional reinforcement.
Increase the pulling pressure gradually. After the gentle test passes, pull harder to simulate real backpack use. The repair must withstand the weight of your packed items without separating. Keep pulling for about 10 seconds to check for delayed failures.
Test the buckle’s fastening mechanism. Open and close it multiple times to ensure smooth operation. The buckle should click or lock securely without resistance. A repaired buckle that doesn’t function properly defeats the purpose of fixing it.
Wet your repair to test waterproofing. If you applied sealant, splash water on the area and let it sit for a few minutes. Water should bead up and roll off rather than seeping into the joint.
Load your backpack with weight and wear it for short periods. Start with light activity around your home. Pay attention to any movement, noise, or shifting at the buckle location. If everything feels stable after 24 hours of use, your repair is successful.
Finally, retest periodically during the first week. Repairs sometimes fail gradually as materials settle and shift. Catching early problems prevents your backpack from failing during important trips.
Final Thoughts
A broken backpack buckle does not mean your bag is done for good. With the right approach, you can fix it yourself and extend the life of your pack significantly.
The two main repair paths are stitched replacement and adhesive bonding. Stitched replacement gives you the strongest, most lasting result. Adhesive bonding works well for small cracks and quick fixes when you need speed over perfection.
Always remove the old stitching before attempting a replacement. This single step prevents most repair failures. A seam ripper makes this easy and keeps the webbing intact.
If you choose adhesive, pair it with mechanical reinforcement. Super glue alone is rarely enough. Adding a melted wire or paper clip across the seam dramatically improves hold strength.
Field repairs are possible even without tools. Cordage, tape, and nearby sticks or rocks can hold a buckle together long enough to get you back to safety. These fixes are temporary, so always follow up with a proper repair at home.
Testing your repair is just as important as making it. Pull tests, wet exposure, and wearing your loaded pack all confirm whether the fix will hold under real conditions.
The most common mistakes are skipping prep steps, using weak adhesives, and rushing curing time. Avoiding these errors gives your repair a much better chance of lasting long term.
Fixing a broken plastic buckle is a practical skill every backpack owner should have. It saves money, reduces waste, and keeps your gear functional for years longer.
Take your time, use the right method for your specific break, and test thoroughly before hitting the trail again.
Frequently Asked Questions
Can I fix a broken buckle without removing old stitching?
No, you should remove the old stitching first. Attempting repairs without this step causes most failures. Use a thread ripper to carefully cut away the existing threads holding the broken buckle. This takes just a few minutes and prevents the new buckle from sitting unevenly. Skipping this step leads to weak repairs that fail quickly.
What’s the best glue for plastic buckles?
Super glue works well for plastic, but adhesive alone isn’t enough. You need mechanical reinforcement to make the repair last. After applying glue to the joint, use a heated paper clip or similar object to melt across the seam. This creates a stronger bond than glue by itself. The combination of adhesive plus reinforcement holds up much better during actual use.
Can I repair a buckle while hiking?
Yes, temporary field fixes are possible without tools. You can use cordage, tape, or nearby materials like sticks to hold the buckle together. This gets your pack functional for the rest of your hike. However, treat field repairs as temporary only. Once you’re home, do a proper stitched or adhesive repair for long term durability.
How do I know if my repair will hold?
Test your repair before trusting it with your pack. Do a gentle pull test first, then increase pressure gradually. If it passes, wet the area to check waterproofing. Finally, load your backpack with weight and wear it for short periods. Retest during the first week to catch any failures early.

Hi, I’m Luna Beck — the founder and voice behind Urban Pack Vault. I’m passionate about helping people find bags that perfectly match their lifestyle. From backpacks to travel luggage, I research, review, and recommend so you never have to second-guess your next purchase.