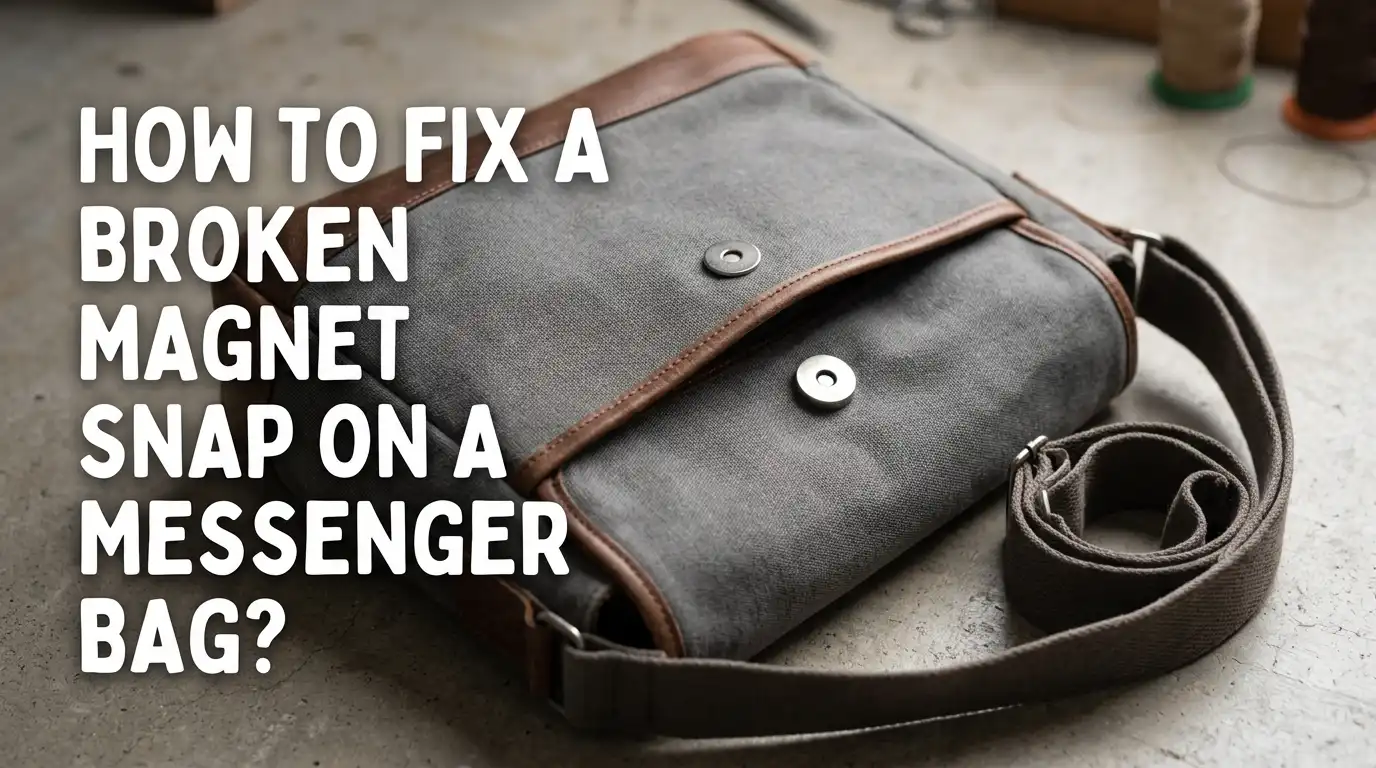
How To Fix A Broken Magnet Snap On A Messenger Bag?
A broken magnet snap can turn your favorite messenger bag into a frustrating mess. Your flap flips open. Your belongings feel exposed. And every time you walk, the bag swings open like a tired old door.
The good news is that you do not need to toss the bag or pay a costly repair shop. With a few basic tools, some patience, and the right method, you can fix that snap at home in under an hour.
This guide walks you through every step, every fix, and every backup plan so your bag closes firmly again.
Key Takeaways
- Identify the snap type first. Most messenger bags use prong style magnetic snaps with a metal washer on the back. Some use sew in snaps or rivet backed snaps. Knowing the type decides the repair path.
- The fabric usually fails before the magnet does. A weak snap is often the result of torn lining or thin fabric around the prongs, not a dead magnet. Always check the fabric first.
- Reinforce the area with interfacing or a fabric patch. A small piece of heavy fusible interfacing or leather scrap behind the snap stops future tearing and keeps the closure tight.
- You only need simple tools. A seam ripper, small pliers, scissors, a needle, and a replacement snap kit handle most repairs. No sewing machine is required for many fixes.
- No sew fixes exist for emergencies. Fabric glue, iron on patches, or even strong adhesive backed magnets can hold the snap in place when you cannot sew right away.
- Always test the closure before final stitching. Press the snap shut, pull gently, and check alignment. Fixing alignment now saves hours later.
Understand Why Your Magnet Snap Broke
Magnet snaps fail for a few common reasons. The most frequent cause is fabric fatigue. Every time you open the flap, you tug the fabric around the prongs. Over months and years, this pulls the prongs loose.
Another reason is bent prongs. If someone yanked the flap hard, the metal prongs can bend backward and lose grip. A third cause is a demagnetized core, which happens rarely but does occur with cheap snaps.
Finally, rust and moisture can weaken the magnet itself. If your bag got soaked in rain, the inside metal might have corroded. Knowing the cause helps you pick the right fix instead of guessing.
Gather The Right Tools And Materials
You do not need a workshop to fix a bag snap. A small kit of basic items covers most repairs. Grab a seam ripper, small needle nose pliers, sharp fabric scissors, a hand sewing needle, and strong thread that matches your bag.
You will also want a replacement magnetic snap set. These usually come in sizes like 10mm, 14mm, or 18mm. Measure your old snap before buying.
Add a small square of fusible heavy interfacing or thin leather scrap for reinforcement. A chalk pencil or fabric marker helps with alignment. If you cannot sew, keep fabric glue or iron on hem tape ready as a backup.
Pro tip: Lay everything on a clean towel before you start. Small parts roll away fast.
Identify The Type Of Snap On Your Bag
Not all magnet snaps work the same way. Take a close look at the back of the snap inside your bag. If you see two flat metal prongs bent over a round washer, you have a prong style snap. This is the most common type on messenger bags.
If you see small stitches around a flat disc with sewing holes, it is a sew in magnetic snap. These hide neatly inside the lining.
A third type uses a small rivet back, often found on leather bags. The rivet looks like a tiny stud on the outside. Each type comes apart differently, so identifying yours first saves time and prevents damage to the bag.
Pros of prong snaps: Easy to install, no sewing required, widely available.
Cons of prong snaps: Prongs can tear thin fabric over time.
Open The Lining To Reach The Broken Snap
Most messenger bags hide the snap backing inside the lining. To access it, look for a small seam near the snap. The bottom seam of the lining often has a stitched opening you can pick apart.
Use a seam ripper to gently pull out the threads. Work slowly. Rushing this step tears the lining and creates more repair work.
Slide your hand inside and find the metal washer behind the snap. If the lining is sewn shut completely, open the bottom seam fully. You can stitch it closed at the end. On leather bags, you may need to lift a glued panel instead. Use a butter knife to ease it open without slicing the leather.
Remove The Old Magnetic Snap Safely
Once you can reach the back of the snap, you will see the bent prongs. Use small needle nose pliers to gently straighten them. Bend each prong back to a flat, upright position.
Push the washer off the prongs first. Then pull the prong piece out through the front of the bag. If the prongs snap off, do not worry. Just push the broken piece through carefully.
If the fabric is torn, take a photo before removing anything. You will use the hole position to align the new snap later. Save the old washer if it still looks good. You can reuse it with a new snap top if the magnet still works.
Pros of reusing parts: Saves money, matches the original look.
Cons of reusing parts: Worn prongs may break again soon.
Inspect And Repair The Fabric Damage
This step matters more than the snap itself. Lay the flap flat and look at the area where the prongs sat. You will likely see a stretched slit or torn fibers.
Cut a small square of heavy fusible interfacing, about two inches by two inches. Iron it onto the back of the damaged area following the package directions. The interfacing acts like a hidden cast that supports the new snap.
For badly torn fabric, cut a matching patch from the inside hem or a hidden spot. Glue or stitch it behind the hole before adding interfacing. Layered reinforcement is the secret to a snap that lasts for years. Leather bags benefit from a thin leather scrap glued behind the hole instead.
Install A New Prong Style Magnetic Snap
With the fabric reinforced, you are ready for the new snap. Mark the exact spot where the snap should sit. Use the washer as a stencil. Trace the two slot lines with chalk.
Cut two small slits with a sharp seam ripper or craft knife. The slits should be just wide enough for the prongs to slide through.
Push the prongs from the outside of the flap to the inside. Place the washer over the prongs on the inside. Use pliers to bend each prong outward, flat against the washer. Press firmly so the snap sits tight against the fabric. Repeat the same steps for the matching half on the body of the bag. Test the closure before sewing the lining back.
Install A Sew In Magnetic Snap Instead
If you prefer no prongs, switch to a sew in magnetic snap. These have small holes around the edge for thread. They are gentler on fabric and leave no metal showing.
Place the snap where you want it. Thread a hand needle with strong polyester thread. Stitch through each hole at least three times, locking the snap to the fabric.
For extra strength, stitch through a small backing patch behind the fabric. This spreads the load over a wider area. Sew in snaps work well for fragile fabric like canvas or thin nylon.
Pros of sew in snaps: No fabric piercing, hidden look, gentle on lining.
Cons of sew in snaps: Slower to install, requires hand sewing skill.
Try A No Sew Fix For Quick Repairs
Sometimes you need the bag working today. A no sew fix can hold you over until a proper repair. Start with a strong adhesive backed magnet placed inside the lining behind the original snap area.
Or use fabric glue to bond a new snap directly to the fabric. Hold it in place with clips while the glue dries for at least four hours.
Another option is iron on hem tape. Sandwich the snap base between two layers of fabric and iron the tape to seal it. This works best on cotton and canvas bags, not slick leather.
Pros of no sew fixes: Fast, beginner friendly, no tools needed.
Cons of no sew fixes: Less durable, may fail under heavy use.
Reinforce The Snap For Long Term Strength
A fresh snap is only as strong as the support around it. To make your repair last, add a double layer of fabric behind the snap. Cut two small circles of denim or canvas and stack them under the washer.
You can also add a thin metal washer on top of the original one. This spreads pressure over a wider area and stops the prongs from cutting through fabric.
For leather bags, glue a thin leather backing patch behind the snap before installing. This adds rigidity without bulk. Reinforcement is the single best step to prevent repeat repairs. A few extra minutes here saves you the same job six months from now.
Close The Lining Neatly
After the snap works perfectly, sew the lining shut. Fold the raw edges inward so no fabric frays. Use a small hand stitch called the ladder stitch or slip stitch for an invisible finish.
Thread a needle with matching thread. Insert the needle inside the fold, then catch the opposite fold. Repeat in small steps along the seam.
Pull the thread snug every few stitches. Knot the thread well at the end and tuck the tail inside the lining. A clean closure makes your repair look factory made. If you cannot sew, use fabric glue along the fold and clamp it shut overnight. Iron on hem tape also works for a quick seal.
Test And Adjust The Snap Alignment
Before celebrating, test the bag. Close the flap and check that both halves of the snap meet cleanly. A misaligned snap feels weak even when it works fine.
If the snap is off by a few millimeters, mark the correct spot with chalk. Open the lining and shift one half slightly. Small adjustments make a big difference in grip strength.
Press the flap shut and try lifting the bag by the flap alone. The snap should hold the full weight of the empty bag without popping open. If it pops, the prongs may be loose or the washer is not flat. Tighten or reset as needed.
When To Take The Bag To A Professional
DIY fixes solve most snap problems, but some bags deserve expert hands. Designer leather bags, vintage pieces, or bags with sealed linings can be tricky. A wrong cut can lower the bag value.
If the lining is fully glued shut or the snap sits under stitched leather panels, a cobbler or leather repair shop has the right tools. They can replace the snap without visible damage.
Expect to pay anywhere from fifteen to fifty dollars for a professional snap repair. Get a quote first. For an everyday messenger bag, a home fix is usually the smarter choice. For a treasured leather satchel, professional help protects your investment.
Frequently Asked Questions
How long does a magnetic snap repair usually last?
A properly installed snap with reinforced fabric can last several years. The key is the backing. Without interfacing or a patch, the fabric may tear again in months.
Can I replace a magnetic snap without sewing?
Yes. Prong style snaps need no sewing at all. You only push the prongs through the fabric and bend them over a washer. Glue and iron on tape offer extra no sew options.
What size magnetic snap should I buy for a messenger bag?
Most messenger bags use a 14mm or 18mm snap. Measure the diameter of your old snap before buying. A larger snap holds heavier flaps better.
Are magnetic snaps safe near credit cards or phones?
Modern credit cards and phones are mostly safe near small bag magnets. Still, avoid pressing the snap directly against a card or phone for long periods. Older magnetic stripe cards can demagnetize over time.
Why does my new snap still feel weak?
The magnet may be a low grade type, or the two halves may be misaligned. Check the alignment first. If alignment is fine, replace the snap with a stronger neodymium version.
Can I use a magnetic snap on a heavy leather bag?
Yes, but choose a rivet back snap for leather. Rivet backs grip leather better than prongs and look cleaner from the outside.
What if the prong tears the fabric again?
Add more reinforcement. Stack two layers of heavy interfacing plus a leather or denim patch. Spread the load across a wider area so no single point takes the full pull.

Hi, I’m Luna Beck — the founder and voice behind Urban Pack Vault. I’m passionate about helping people find bags that perfectly match their lifestyle. From backpacks to travel luggage, I research, review, and recommend so you never have to second-guess your next purchase.