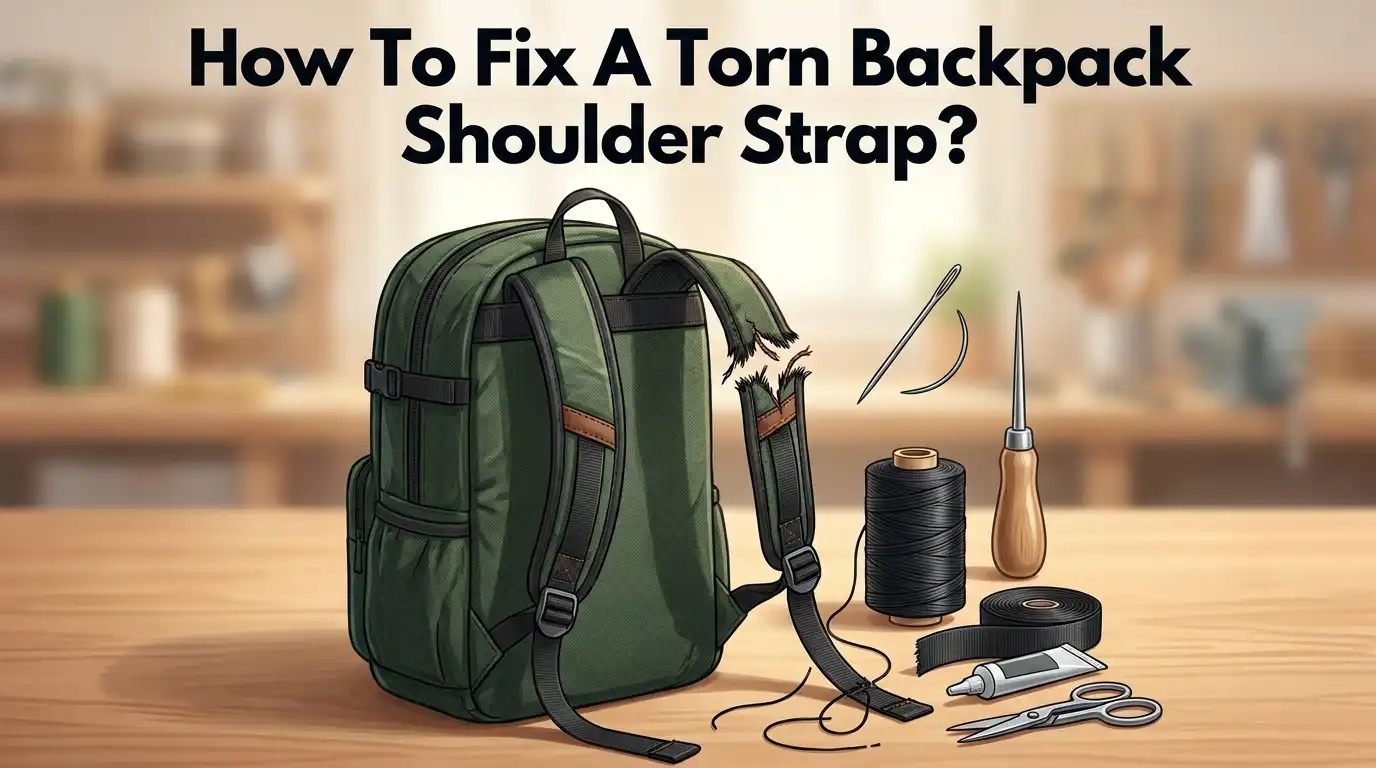
How To Fix A Torn Backpack Shoulder Strap?
A torn backpack shoulder strap can turn a regular day into a frustrating one. Whether the strap has fully ripped off or just started fraying at the edges, the damage always seems to happen at the worst possible time.
The good news is that you don’t need to replace your entire backpack. Most shoulder strap damage is very fixable at home with basic tools and a little patience.
Knowing the type of tear you’re dealing with makes a big difference. A partial tear needs a different fix than a strap that has completely detached. Fraying edges also need their own early treatment before the damage spreads further.
In a Nutshell
- Identify the type of tear first. A partial tear, complete detachment, and fraying each need a different fix.
- Use the right thread. Heavy-duty or sashiko thread holds up far better than regular thread for strap repairs.
- The backstitch is your best friend. This sewing technique creates a strong, tight seam that can handle daily stress and weight.
- Superglue helps with fraying, but use it sparingly. Too much adhesive stiffens the fabric and makes sewing harder.
- Seam ripping is a necessary step when replacing a slider or buckle. Skipping it causes uneven results and weak repairs.
- You can do this by hand or with a sewing machine. Hand sewing works well for small tears, while a machine speeds up larger repairs.
Assessing the Damage: Types of Shoulder Strap Tears
Shoulder strap tears fall into three main categories. Understanding which one you have determines how you’ll fix it.
Partial tears happen when the fabric rips but stays attached to the backpack. The strap still connects at both ends, but a section of it has split open. You might see fraying edges or a clean cut through the material. This type is the easiest to repair because you don’t need to reattach anything. You simply reinforce the damaged area.
Complete detachment occurs when the strap tears completely away from the backpack body. The entire strap hangs loose, or it separates entirely from one end. This requires you to sew the strap back onto the pack. You’ll need to work with the seam where the strap originally attached.
Fraying damage is the early stage of deterioration. The fabric edges start to unravel and separate into individual threads. Fraying often happens at stress points where the strap connects to the backpack. If you catch this early, you can prevent it from becoming a larger tear.
Slider and buckle failures are a special case. The strap itself might be fine, but the hardware holding it in place fails. This requires removing the damaged slider or buckle and installing a new one.
Each tear type needs a different approach. Partial tears need reinforcement stitching. Complete detachment requires reattachment sewing. Fraying needs edge treatment with superglue or thread wrapping. Slider failures need component replacement.
The key is identifying your specific damage first. Look closely at where the tear is located and how severe it is. Check if the strap is still attached to the backpack or if it’s completely loose. Examine the edges for fraying. Once you know what you’re dealing with, the repair becomes straightforward and manageable.
Tools and Materials You Will Need
Before you start fixing your torn backpack shoulder strap, gather the right supplies. Having everything ready makes the job faster and easier.
Heavy-duty thread is your first essential item. Regular sewing thread breaks too easily under the weight and stress that backpack straps experience daily. Sashiko thread works even better because it’s thicker and stronger. This thread won’t snap when you’re carrying a loaded pack.
You need a proper needle too. An embroidery needle has a larger eye that accommodates heavy-duty thread easily. If you’re using a sewing machine instead of hand sewing, make sure your machine can handle thick thread. Some machines require special needles for heavy materials.
Scissors are necessary for cutting thread cleanly and trimming any loose fabric edges. Sharp scissors make precise cuts that prevent additional fraying.
Superglue is optional but helpful for stopping frayed edges early. Use it sparingly to stiffen fabric fibers without creating stiff, brittle spots. A small amount goes a long way. Too much adhesive makes the fabric hard and uncomfortable to wear.
A thimble protects your finger when hand sewing through thick fabric. This is especially useful if you’re pushing a needle through multiple layers of backpack material. Your fingertip will thank you.
If your tear involves a broken slider or buckle, you’ll also need a seam ripper. This small tool cuts through existing stitches so you can remove the old component without damaging the strap fabric. It makes slider replacement much easier than using scissors or a knife.
Lay out all your materials before starting. Check that your thread matches the backpack color if appearance matters to you. Having everything in one place prevents frustration and keeps you focused on making a strong, lasting repair.
How To Stop Fraying Before It Gets Worse
Fraying happens when fabric threads start coming loose at the edges of your tear. This is the early warning sign that damage will get worse if you don’t act fast. The good news is stopping fraying is simple and takes just a few minutes.
The first step is to trim any loose threads sticking out from the damaged area. Use scissors to cut them as close to the fabric as possible. This removes the threads that would otherwise keep unraveling.
Next, apply a tiny amount of superglue directly to the frayed edges. Use sparingly here – too much glue will make the fabric stiff and uncomfortable. You only want enough to stiffen the fibers so they stop separating. Let the glue dry completely before touching the strap.
Once the glue sets, you can reinforce the area with stitching. Use heavy-duty thread to sew along the frayed edge with small, tight stitches. A backstitch works best because it creates a strong line that holds the threads in place. This prevents the fraying from spreading further down the strap.
For partial tears where the strap is still attached, focus on the edges of the rip itself. Apply glue to both sides of the tear opening, then sew along the line where the fabric separated. This seals the gap and stops threads from loosening.
Check your backpack regularly for new fraying. Catching it early means you can stop damage before it becomes a bigger problem. If you notice fraying starting in a new spot, repeat this process right away.
The key is acting fast. Fraying gets worse quickly when left untreated, but a few minutes of prevention now saves you from major repairs later.
How To Reattach a Completely Torn-Off Shoulder Strap
When your shoulder strap tears completely away from your backpack, you need a strong reattachment method. The backstitch sewing technique works best for this job because it creates a durable seam that holds up to daily wear and weight.
Start by preparing the attachment point on your backpack body. Clean the area where the strap originally connected. Remove any loose threads or debris. If the fabric is frayed at the attachment point, trim it carefully with scissors.
Next, prepare the strap itself. Lay it flat and check the end that will reattach to your backpack. The strap end should be clean and ready for sewing. If you notice fraying here too, apply a small amount of superglue to stiffen the edges. This prevents more threads from coming loose during sewing.
Now thread your needle with heavy-duty or sashiko thread. These threads are thicker and stronger than regular sewing thread. Use an embroidery needle or sewing machine for best results. If hand sewing, wear a thimble to protect your finger when pushing through thick fabric layers.
Position the strap end against the backpack body exactly where it should attach. Use the backstitch method by pushing your needle through both the strap and backpack fabric, then bringing it back through to create overlapping stitches. Make multiple passes over the same area to build strength.
Sew at least one inch along the original seam line. Go back and forth several times to reinforce the connection. Make your stitches close together for maximum durability. After completing the stitching, tie off your thread securely on the inside of the backpack.
Test the reattached strap by pulling it gently. It should feel solid and not shift around. If it feels loose, add more stitches for extra reinforcement. Your backpack is now ready to use again.
How To Repair a Partial Tear or Rip in the Strap
A partial tear or rip in your shoulder strap is easier to fix than a complete separation. The strap stays attached to your backpack, but the fabric has split or frayed along part of its length.
Start by examining the tear closely. Look at how long the rip is and whether the edges are fraying. Small tears under two inches often need just reinforcement. Larger tears may require patching underneath the strap for extra strength.
Trim any loose threads hanging from the tear. Use sharp scissors to cut them flush with the fabric surface. This prevents the fraying from spreading further down the strap.
Apply a small drop of superglue along the frayed edges if you want to stiffen them before sewing. Let it dry completely. This step is optional but helps prevent the tear from getting worse before you stitch it.
Now it’s time to sew the tear closed. Thread your needle with heavy-duty or sashiko thread. These threads are thicker and stronger than regular sewing thread. A thimble protects your finger when pushing the needle through thick backpack material.
Use a backstitch technique for maximum strength. Start at one end of the tear and work your way along the rip. Make stitches close together, about one quarter inch apart. Backstitch means you push the needle backward through the previous stitch hole, creating overlapping stitches that lock together.
Sew at least one inch beyond each end of the tear. This reinforces the area around the damage. If the tear is very long, consider sewing a patch of fabric underneath the strap for additional support.
Pull the thread tight but not so tight that you pucker the fabric. Tie off your thread with a secure knot when you finish. Test the repair by pulling the strap gently to make sure the stitches hold.
How To Replace a Damaged Strap Slider or Adjuster
A strap slider or adjuster helps you tighten and loosen your backpack shoulder straps. When this component breaks or gets damaged, the strap becomes harder to adjust. Replacing it is a straightforward repair you can do at home.
First, you need to remove the old slider. Use a seam ripper to carefully cut the stitches holding the slider in place. Work slowly around all edges of the slider attachment point. Once the stitches are cut, gently pull the slider away from the fabric.
Next, examine the fabric panel where the slider was attached. If the fabric is torn or worn, you may need to trim it slightly. This gives you a clean edge to work with for the new slider.
Now prepare your new slider. Most sliders have two slots or openings where the strap fabric passes through. Thread the strap fabric through these slots just like the old slider was positioned. Make sure the slider sits at the correct angle so it functions properly.
Position the new slider exactly where the old one was. This maintains the original strap length and fit. Hold the slider firmly in place with your fingers.
Sew the slider securely using heavy-duty thread and a needle or sewing machine. Use a backstitch technique if hand sewing. Stitch around all four sides of the slider attachment point. Make your stitches small and close together for strength.
Sew at least one inch beyond the slider edges. This reinforces the attachment area and prevents the slider from pulling loose.
Test your work by adjusting the strap up and down several times. The slider should move smoothly without wobbling. Pull on the strap gently to make sure it’s secure.
If the slider feels loose after testing, add extra stitches in any weak spots. Strong slider attachment prevents future strap problems and keeps your backpack comfortable to wear.
Common Mistakes To Avoid When Repairing a Shoulder Strap
Many people make mistakes when fixing shoulder straps because they rush the job. The most common error is using too much adhesive. When you apply superglue, use only a tiny drop on frayed edges. Excess glue can seep into the fabric, making it stiff and brittle. This actually weakens the repair instead of strengthening it.
Another frequent mistake is skipping the seam ripping step before replacing a slider or adjuster. You must remove the old stitches completely before installing a new component. If you sew over existing seams, the layers become too thick. Your needle may break, or the new slider won’t sit flat against the fabric.
Many people also sew too close to the tear or damage point. When you backstitch a rip closed, you need to extend your stitching at least one inch beyond each end of the damage. Stopping right at the tear means the repair will fail quickly. The stress concentrates at the stitching edge and causes new rips nearby.
Choosing the wrong thread is another mistake to avoid. Regular sewing thread will snap under the weight of a loaded backpack. Always use heavy duty thread or sashiko thread designed for strong repairs. These threads handle constant tension and pulling without breaking.
People also overtighten their stitches, which puckers the fabric and creates weak spots. Pull your thread snug but not so tight that you can see wrinkles forming in the material. The fabric should lie flat after each stitch.
Finally, avoid testing your repair immediately after finishing. Let any adhesive dry completely before you pull on the strap. Give yourself at least 24 hours before loading your backpack heavily. This patience ensures your repair holds up during actual use.
Final Thoughts
A torn backpack shoulder strap is a fixable problem. You do not need to throw away your backpack just because a strap has ripped, frayed, or lost its slider.
The key is to act early. Small frays and partial tears are much easier to fix than complete separations. Treat the damage as soon as you notice it to prevent the problem from getting worse.
The repair method depends on the type of damage. A partial tear needs sewing with a strong backstitch. A completely torn strap needs careful reattachment. A damaged slider needs seam ripping before you can replace it properly.
Always use heavy-duty or sashiko thread for any shoulder strap repair. Regular thread will not hold up under the weight and movement that a backpack strap handles every day.
Superglue is a helpful first step for fraying edges, but use it sparingly. Too much adhesive stiffens the fabric too much and makes sewing harder.
Take your time with every repair. Rushing leads to weak stitches, puckered fabric, and repairs that fail quickly. A careful job done slowly will last far longer than a quick fix done carelessly.
Always test your repair before you load the backpack with heavy items. Gently pull on the strap and check that the stitches hold firm. Add extra stitches to any spots that feel loose.
Good maintenance habits also help. Check your straps regularly for early signs of fraying or stress. Catching damage early means a simpler and faster repair every time.
With the right materials and a little patience, you can restore your shoulder strap to full working condition. A well-repaired strap can last just as long as the original, saving you money and keeping your favorite backpack in use for years to come.
Frequently Asked Questions
Can I use regular thread instead of heavy duty thread?
Regular thread breaks easily under the weight and stress of a backpack. Your shoulder strap carries your entire load, so it needs strong reinforcement. Heavy duty thread and sashiko thread are thicker and more durable. They hold stitches better during daily wear and tear.
What happens if I apply too much superglue to frayed edges?
Excess glue makes the fabric stiff and brittle. It can also seep into the weave and create hard spots that crack easily. Use superglue sparingly to stiffen only the frayed edges. A small amount goes a long way.
Should I sew by hand or use a sewing machine?
Both methods work well. Hand sewing with a backstitch gives you precise control over each stitch. A sewing machine works faster and creates consistent stitches. Choose based on what you have available. Either way, use heavy duty thread for best results.
How long should I wait before using my backpack after repair?
Wait at least 24 hours if you used superglue. The adhesive needs time to fully cure and harden. If you only sewed the strap, you can use it right away. Test the repair first by adjusting the strap and checking all stitches before loading heavy items.
What’s the difference between a partial tear and a complete separation?
A partial tear means the strap is still attached but damaged. You sew along the tear line to close it. A complete separation means the strap tore off entirely. You must reattach it by sewing the torn ends back together securely.

Hi, I’m Luna Beck — the founder and voice behind Urban Pack Vault. I’m passionate about helping people find bags that perfectly match their lifestyle. From backpacks to travel luggage, I research, review, and recommend so you never have to second-guess your next purchase.