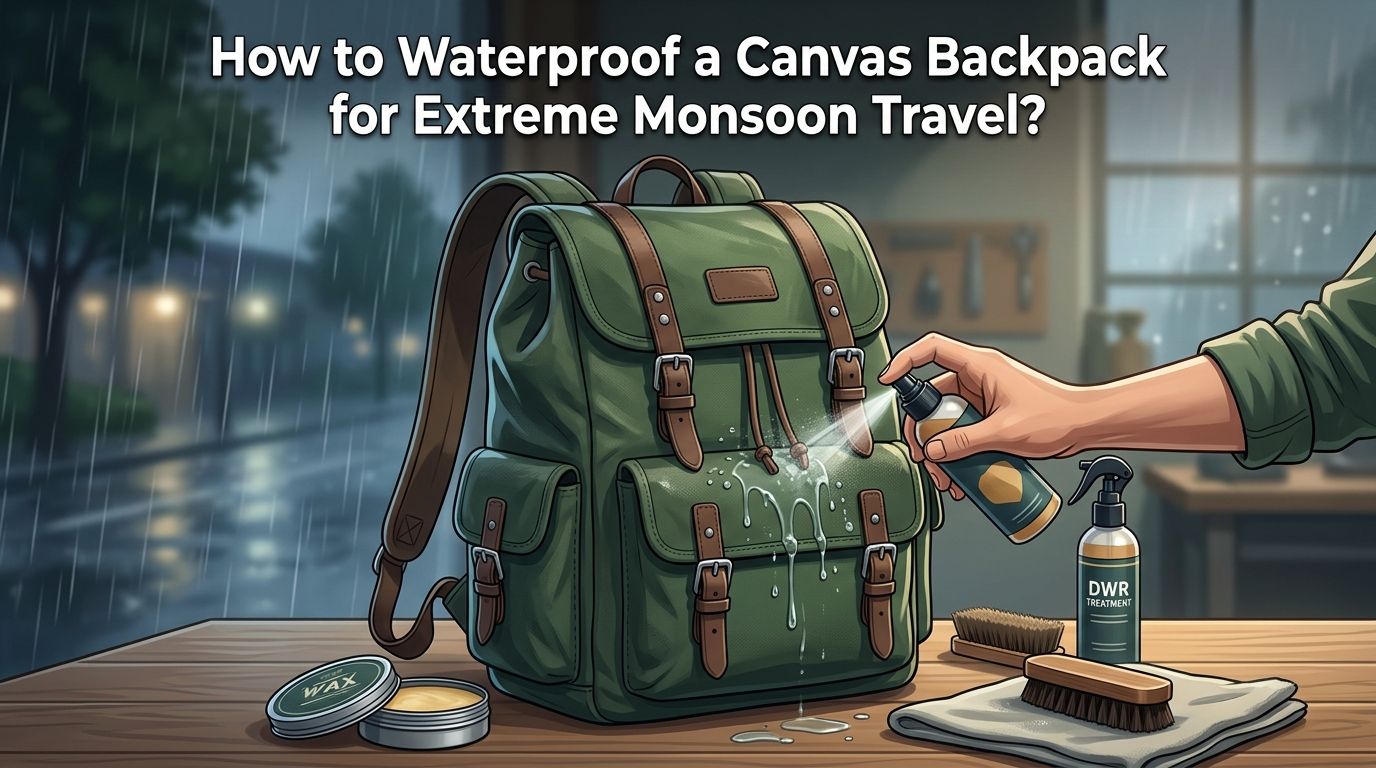
How to Waterproof a Canvas Backpack for Extreme Monsoon Travel?
Monsoon season is beautiful, but it can destroy your gear in minutes. Heavy rain, sudden downpours, and constant humidity will soak through an untreated canvas backpack before you can find shelter. Your electronics, documents, and clothing are all at risk.
Canvas is a tough, breathable, and classic material. But it is not waterproof on its own. The tightly woven cotton fibers offer some resistance to light rain, yet they will absorb water quickly during a monsoon. That means everything inside your bag could be ruined in one storm.
The good news? You can waterproof a canvas backpack at home with affordable methods. Whether you prefer wax, spray, or a combination approach, there is a solution that fits your budget and travel style.
Key Takeaways
- Canvas backpacks are not waterproof by default. The cotton fibers will absorb moisture during heavy rain. You must treat the fabric before traveling in monsoon conditions. Skipping this step puts all your belongings at risk of water damage.
- Wax treatment offers the strongest and longest lasting protection. A beeswax and paraffin wax blend creates a physical barrier on the canvas fibers. This method can last several months before it needs reapplication. It is the top choice for extreme monsoon travel.
- DWR (Durable Water Repellent) sprays provide a quick and lightweight option. These sprays coat canvas fibers with a chemical layer that causes water to bead and roll off. They are easy to apply but wear off faster than wax, often within a few weeks of heavy use.
- Seam sealing is just as important as surface treatment. Most water leaks into a backpack through the stitched seams, not the fabric itself. A quality seam sealant closes these tiny needle holes and prevents water from seeping in.
- A layered approach gives the best results. Combine fabric treatment with a rain cover and internal dry bags. This three layer defense protects your gear even during the most intense monsoon downpours.
- Regular maintenance keeps your backpack protected. Waterproofing treatments break down over time, especially with daily use in heavy rain. Check your backpack’s water resistance every few weeks and reapply treatment as needed during your trip.
Why Canvas Backpacks Fail in Monsoon Conditions
Canvas is made from tightly woven cotton or a cotton blend. The weave provides some natural water resistance, especially when the fibers swell from moisture. But this effect only works against light drizzle.
Monsoon rain is a different challenge entirely. Downpours can deliver inches of rain per hour. Water pushes through the weave, soaks into the fibers, and saturates the entire bag. Once canvas is wet, it stays wet for a long time because the thick fabric dries slowly in humid conditions.
The weight of a soaked canvas backpack also increases dramatically. A dry bag that weighs two pounds can absorb enough water to feel twice as heavy. This extra load strains your shoulders and back during long travel days.
Understanding Your Waterproofing Options
There are three main methods to waterproof canvas: wax coating, DWR spray, and silicone based spray. Each method works differently and suits different needs.
Wax fills the gaps between canvas fibers and creates a physical seal. DWR spray adds a chemical coating that repels water at the surface. Silicone spray forms an invisible layer that blocks moisture from penetrating the weave.
You can also combine methods for extra protection. Many experienced travelers apply wax as the base layer and then add a DWR spray on top. This combination handles extreme rain better than any single method alone. Your choice depends on your budget, how much time you have before your trip, and how long you need the protection to last.
How to Waterproof a Canvas Backpack with Wax
Wax treatment is the gold standard for canvas waterproofing. A popular DIY recipe uses 60% beeswax and 40% paraffin wax melted together. Some people also add a small amount of boiled linseed oil to improve flexibility.
Start by cleaning your backpack thoroughly. Remove all dirt and dust. Lay the bag flat on a clean surface. Melt your wax mixture using a double boiler and apply it to the canvas with a clean cloth or brush. Work the wax into every inch of fabric using firm, circular motions. Pay extra attention to seams, zippers, and the bottom panel.
After applying, use a hair dryer or heat gun on low setting to melt the wax deeper into the fibers. This step is critical. The heat helps the wax penetrate the weave and bond with the cotton. Let the bag cool completely before testing.
Pros: Long lasting protection, excellent for extreme rain, adds a vintage look, eco friendly with natural wax. Cons: Makes canvas stiffer, slightly darkens fabric color, requires reapplication every three to six months, time consuming to apply.
How to Waterproof a Canvas Backpack with DWR Spray
DWR spray is the fastest waterproofing method. Clean your backpack first. Hang it outdoors or in a well ventilated area. Hold the spray can about six inches from the surface and apply in steady, sweeping motions.
Cover every section of the bag evenly. Do not oversaturate any single area. Let the first coat dry for about 30 minutes, then apply a second coat. Most DWR sprays need at least 24 hours to fully cure before they reach maximum effectiveness.
Test the coating by sprinkling water on the surface. If the water beads up and rolls off, your treatment is working. If the water soaks in, apply another coat.
Pros: Quick application, does not change fabric texture, lightweight, affordable, widely available. Cons: Wears off faster than wax, needs reapplication every few weeks with heavy rain exposure, less effective in extreme downpours, some sprays contain chemicals that raise environmental concerns.
How to Waterproof with Silicone Based Spray
Silicone spray creates a thin, invisible barrier on canvas fibers. The application process is similar to DWR spray. Clean the backpack, spray evenly, and allow it to dry completely.
Silicone works well because it does not change the feel or appearance of the canvas. It also provides decent UV protection, which matters during monsoon travel when the sun appears between storms.
One important note: silicone spray can reduce breathability. This means moisture trapped inside the bag may not escape easily. If you pack damp clothing, it could create a humid environment inside your backpack.
Pros: Does not alter fabric appearance, easy to apply, adds UV resistance, good for moderate rain. Cons: Reduces breathability, less effective than wax for extreme rain, needs frequent reapplication, can feel slightly slippery on the fabric surface.
Why Seam Sealing Is Critical for Monsoon Travel
Your backpack’s fabric might be fully waterproofed, but water still finds a way in. Seams are the number one weak point. Every stitch creates a tiny hole in the fabric. Multiply that by hundreds of stitches, and you have a highway for water.
Seam sealant is a liquid adhesive that you apply along every stitched line. Products like urethane based sealants work best for canvas. Apply the sealant to the outside of the seams using a small brush. Let it dry for at least 12 hours before use.
Focus on the bottom seams, shoulder strap attachment points, and zipper lines. These areas receive the most stress and water exposure. A properly sealed backpack can keep water out even when submerged briefly in a puddle or stream.
How to Use a Rain Cover for Extra Protection
A waterproof rain cover is a simple but effective backup layer. It slips over your backpack and shields it from direct rain. This is especially useful during sudden monsoon downpours that can overwhelm any surface treatment.
Choose a rain cover that fits your backpack snugly. A loose cover will flap in the wind and allow water to pool in folds. Most rain covers come with an elastic edge that grips the bottom of the bag.
However, rain covers have a limitation. Water can still reach your backpack through the back panel where the cover does not seal against your body. Sweat and wind driven rain can bypass the cover in this area. That is why a rain cover works best as part of a layered waterproofing system, not as your only defense.
Internal Dry Bags: Your Last Line of Defense
Even with wax, spray, and a rain cover, smart travelers add one more layer. Internal dry bags protect your most important items if everything else fails.
Place electronics, documents, and spare clothing inside separate dry bags before loading them into your backpack. Roll top dry bags seal out water completely. Even if your backpack gets fully soaked during a monsoon, the contents of these bags stay dry.
You can also use a large trash compactor bag as a pack liner. Open it inside your backpack and pack everything inside it. Twist the top closed and fold it down. This budget friendly option provides solid protection against rain that seeps through the outer layers.
How to Test Your Backpack’s Waterproofing Before Travel
Never trust a new waterproof treatment without testing it first. Fill your backpack with paper towels or newspaper. Paper shows moisture immediately, so you will know exactly where water is getting through.
Hold the packed bag under a running shower for five minutes. Simulate different angles of rain by tilting the bag. Check the bottom panel and seam areas most carefully.
After the test, open the bag and inspect the paper. Any damp spots reveal weak points in your waterproofing. Treat those areas again and test a second time. This process takes an extra day, but it can save your gear during a real monsoon storm.
How to Maintain Waterproofing During a Long Monsoon Trip
Waterproof treatments wear down with daily use. Friction from straps, contact with surfaces, and constant rain exposure all degrade the protective layer. Carry a small bottle of DWR spray in your travel kit for touch ups on the road.
Inspect your backpack every few days during your trip. Look for areas where the fabric appears darker or absorbs water instead of repelling it. These spots need immediate reapplication.
Dry your backpack completely at every opportunity. Hang it in a well ventilated room or under a ceiling fan. Never pack a damp backpack into a closed space. Trapped moisture promotes mold growth, which can weaken canvas fibers and ruin the waterproof coating.
Protecting Electronics and Valuables Inside Your Pack
Monsoon travel usually involves carrying phones, cameras, power banks, and important documents. These items suffer permanent damage from water exposure. A single leak can destroy hundreds of dollars worth of electronics.
Place each electronic device in its own sealed pouch or ziplock bag. For extra safety, use the double bag method: put the device in one sealed bag, then place that bag inside a second one. This way, even if the outer bag fails, the inner bag holds.
Store documents like passports and travel insurance papers in a waterproof document sleeve. Keep this sleeve in the most protected area of your backpack, which is usually the center of the bag surrounded by clothing that acts as a buffer.
Common Mistakes to Avoid When Waterproofing Canvas
The biggest mistake is applying waterproofing treatment to a dirty backpack. Dirt and oils create a barrier between the treatment and the canvas fibers. The wax or spray bonds with the grime instead of the fabric, and it peels off quickly.
Another common error is skipping the curing time. Both wax and spray treatments need time to bond with the canvas. Using the backpack too soon after treatment reduces effectiveness by up to half. Always wait the full recommended drying time.
Some travelers also make the mistake of treating only the outside of the bag. The bottom panel and interior lining can also absorb water. Apply a light coat of DWR spray to the interior for added protection, especially on the bottom section that often sits on wet ground.
Step by Step Checklist for Monsoon Ready Waterproofing
Follow this complete checklist to prepare your canvas backpack. Step one: Wash and fully dry the backpack. Step two: Apply wax treatment to all exterior surfaces and work it into the fabric with heat.
Step three: Let the wax cure for 24 hours. Step four: Apply seam sealant to all stitched areas on the outside of the bag. Step five: Allow the sealant to dry for 12 hours.
Step six: Spray a light coat of DWR spray over the entire bag for an extra layer of protection. Step seven: Test the backpack under running water and fix any weak spots. Step eight: Pack a rain cover, internal dry bags, and a travel sized DWR spray bottle in your kit. With all eight steps completed, your canvas backpack is ready for the heaviest monsoon rains.
Frequently Asked Questions
Can I use regular candle wax to waterproof my canvas backpack?
Regular candle wax is usually paraffin and can provide basic water resistance. But it cracks easily and does not stay flexible in changing temperatures. A beeswax and paraffin blend performs much better because beeswax adds flexibility and durability. Pure candle wax also tends to leave a white residue that flakes off during travel.
How often do I need to reapply waterproofing during monsoon season?
This depends on your method. Wax treatments typically last three to six months with moderate use. DWR sprays need reapplication every two to four weeks during heavy monsoon exposure. Check your bag regularly and reapply treatment to any area where water stops beading on the surface.
Will waterproofing wax damage the canvas fabric?
Wax does not damage canvas, but it changes the texture. The fabric becomes stiffer and slightly darker in color. Over time, heavily waxed canvas develops a distinctive patina that many travelers actually prefer. If you want to keep the original look and feel, DWR spray is a better choice.
Is a rain cover enough to protect my backpack in a monsoon?
A rain cover alone is not sufficient for extreme monsoon conditions. Wind driven rain can get underneath the cover, and water can reach the back panel. Use a rain cover as part of a layered approach that includes surface waterproofing treatment, seam sealing, and internal dry bags for maximum protection.
Can I waterproof a backpack that has leather trim or straps?
Yes, but you need to treat the canvas and leather separately. Canvas requires wax or DWR spray, while leather needs a dedicated leather waterproofing cream or oil. Avoid getting canvas wax on the leather, as it can stain or dry out the material. Apply each treatment carefully and use painter’s tape to protect areas where the two materials meet.
How do I remove old wax before reapplying a new coat?
Place the backpack in direct sunlight or use a hair dryer to warm the surface. Wipe off the softened wax with clean rags. For stubborn buildup, use a small amount of mineral spirits on a cloth. Let the bag dry fully before applying fresh wax treatment. This process ensures the new coat bonds directly with the canvas fibers.

Hi, I’m Luna Beck — the founder and voice behind Urban Pack Vault. I’m passionate about helping people find bags that perfectly match their lifestyle. From backpacks to travel luggage, I research, review, and recommend so you never have to second-guess your next purchase.