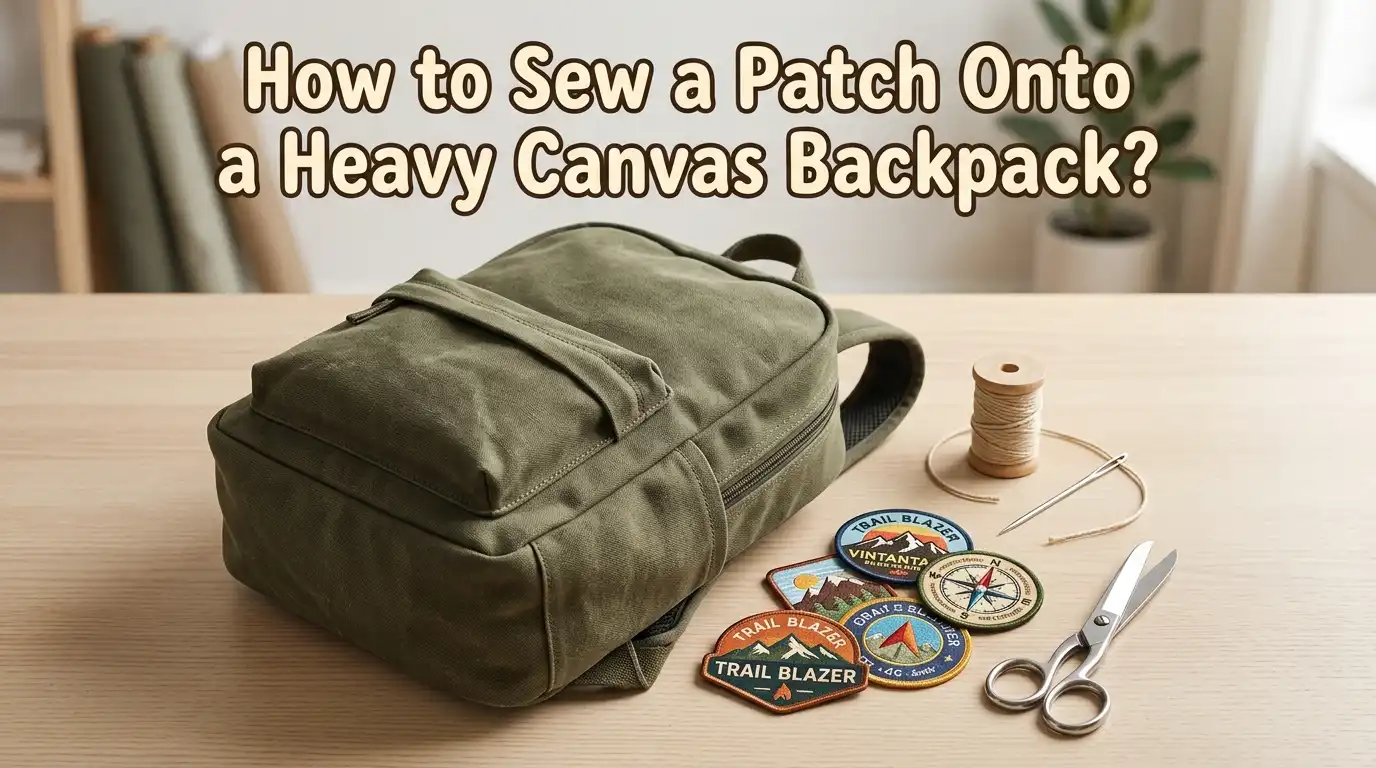
How to Sew a Patch Onto a Heavy Canvas Backpack?
A heavy canvas backpack can take a lot of wear. That is why a loose patch can peel, curl, or tear off fast if you sew it the wrong way.
The good news is that you do not need a sewing machine to get a clean and secure result. You only need the right needle, strong thread, steady stitches, and a smart plan.
This guide shows you exactly how to sew a patch onto a heavy canvas backpack by hand. You will learn how to choose the best spot, hold the patch in place, pick the right stitch, and reinforce the edges so the patch stays on through daily use.
In a Nutshell
- Use the right tools first. Heavy canvas fights back. A sharp needle, strong thread, small scissors, and a thimble make the job much easier. Waxed thread also helps because it slides better and tangles less.
- Pick a flat area on the backpack. Avoid thick seams, straps, and padded spots if you can. These areas are harder to pierce by hand. They also make your stitches uneven. A smooth panel gives you better control and a cleaner finish.
- Choose your stitch based on your goal. A whip stitch is simple and great for beginners. A backstitch gives more holding power. A blanket stitch adds a visible border that can look nice around the patch. Each method works, but each one has tradeoffs.
- Hold the patch still before you sew. Safety pins, a few basting stitches, or a tiny amount of fabric glue can stop the patch from sliding. This step saves time later because you will not need to remove crooked stitches and start over.
- Reinforce corners and stress points. Backpack fabric bends and rubs every day. The corners of a patch often lift first. Add a few extra stitches in those spots. That small step can add a lot of life to the patch.
- Finish neatly and check your work. Tie off the thread with more than one locking loop. Then press the patch flat with your fingers and inspect the full edge. If you catch a loose spot right away, you can fix it before the patch starts to peel.
Why Hand Sewing Works Well on Heavy Canvas
Hand sewing works well on a heavy canvas backpack because it gives you more control. You can feel each layer as the needle moves through the fabric. That matters when the bag has pockets, foam, or a lining behind the area where you want the patch.
A sewing machine can be fast, but it can also be awkward on a bulky backpack. Hand sewing lets you move slowly and place each stitch with care. You can also avoid sewing through parts of the bag that should stay free, like an inside pocket.
Pros: Hand sewing is precise, low cost, and easy to do on a finished bag. It also works in tight areas where a machine cannot fit.
Cons: It takes more time, and thick fabric can tire your fingers. That is why a thimble and strong needle matter so much.
Gather the Right Tools Before You Start
Good tools make this job much easier. Start with a sharp hand sewing needle that can handle thick fabric. A strong polyester thread is a smart choice for a backpack because it holds up well with daily wear. You also need small scissors, a thimble, and a few safety pins or clips.
If the canvas is very stiff, keep an awl or even smooth pliers nearby. These tools help you push or pull the needle through thick spots. A ruler or chalk pencil also helps if you want the patch centered and straight.
Best basic tool list: needle, thread, scissors, thimble, pins, and a flat work surface.
Helpful extras: wax for the thread, chalk, awl, and pliers.
Pros: The right setup saves time and reduces hand strain.
Cons: If you skip these basics, the job feels much harder than it should.
Choose the Best Patch and Thread for Heavy Canvas
Not every patch behaves the same way. A flat embroidered patch with a clean border is easier to sew than a thick patch with a stiff backing. If your patch has heat glue on the back, you can still sew it by hand. In fact, sewing is often the safer long term choice for a backpack.
For thread, pick a strong polyester or nylon thread. A heavier thread gives better hold on canvas, and waxed thread is easier to manage because it tangles less. Match the thread color to the patch edge if you want a quiet look. Use a contrast color if you want the stitches to show.
Pros of waxed thread: smoother sewing, less tangling, stronger feel.
Cons of waxed thread: it can leave a slight coating on light fabric.
Pros of matching thread: cleaner look.
Cons of matching thread: mistakes are harder to see while you sew.
Pick the Best Spot on the Backpack
Patch placement matters more than many people think. A flat area is the easiest place to sew. The front pocket panel, top flap, or outer body panel usually works well. Avoid thick seams, zipper edges, strap anchors, and places where the bag folds hard.
Before you commit, put the backpack on a table and look inside the bag too. You need to know what sits behind that panel. There may be a lining, mesh pocket, foam padding, or another layer that you do not want to catch with your stitches. This quick check prevents a lot of frustration.
Pros of a flat panel: easier stitching, cleaner edge, less strain on the needle.
Cons of sewing near seams: hard to pierce, uneven stitches, more hand fatigue.
A good spot does two jobs. It looks balanced from the outside, and it gives you enough room to sew with control.
Prep the Backpack and the Patch First
Preparation makes the sewing cleaner. Empty the backpack so the fabric can lie flat. If the bag is dusty, wipe the area with a slightly damp cloth and let it dry. A clean surface helps the patch sit flat and makes it easier to mark placement.
Set the patch where you want it and check the angle from a few steps back. A patch can look centered up close and still sit crooked when you stand up. If you want a guide, mark tiny points with chalk around the corners. Small marks can save you from redoing the whole job.
If the patch edge has loose threads, trim them before sewing. If the patch feels very stiff, gently bend it a few times with your fingers so it shapes to the bag better.
Pros of prep work: better placement and fewer mistakes.
Cons: it adds a few minutes, but it saves much more time later.
Hold the Patch in Place Before You Sew
A moving patch is one of the main reasons people get uneven stitches. You need a temporary way to keep it still. Safety pins work well for many people. A few loose basting stitches also work if you do not mind removing them later. Some people use a tiny amount of fabric glue at the center or edges.
Each method has a clear use. Safety pins are fast and clean. Basting is very secure and gives good control. Fabric glue can help on thick canvas, but use only a small amount if you still plan to sew.
Pros of safety pins: easy, removable, no mess.
Cons: they can shift on bulky fabric.
Pros of basting: very stable, great for careful placement.
Cons: extra sewing time.
Pros of light glue: keeps the patch flat while you stitch.
Cons: too much glue can make the needle sticky and the fabric stiff.
Use the Whip Stitch for an Easy and Strong Finish
The whip stitch is the easiest hand stitch for many beginners. It wraps over the patch edge and catches the backpack fabric right next to it. This works very well on heavy canvas because you can often grab just the top layer instead of forcing the needle through every layer inside the bag.
Start from the back side of the patch edge if you can hide the knot there. Bring the needle up, then pass it over the edge and back through the canvas close to the first stitch. Keep going around the patch with even spacing. Short, even stitches usually look best.
Pros: simple to learn, strong enough for most patches, good for thick bags.
Cons: the stitches stay visible, and they can look uneven if your spacing drifts.
If you want the easiest method that still holds well, the whip stitch is often the best place to start.
Use the Backstitch When You Need Extra Strength
If the backpack gets heavy use, a backstitch gives more holding power. This stitch forms a firm line because each new stitch meets the last one. It takes longer than a whip stitch, but the result is strong and tidy. Many people use it on stress points because it resists pulling well.
To do it, bring the needle up one stitch length ahead. Then go back into the end of the last stitch. Bring the needle up ahead again and repeat. You create a solid row that looks neat and tight. Keep your stitches small and close for the best hold.
Pros: very strong, neat finish, great for daily use.
Cons: slower, harder on thick canvas, and more likely to catch extra layers if you are not careful.
If you want a patch that stays down through repeated rubbing and weight, the backstitch is a smart choice.
Try the Blanket Stitch for a Decorative Edge
The blanket stitch is useful when you want the patch edge to stand out. This stitch creates a looped border that frames the patch. It can look great on a simple canvas bag because the stitch itself becomes part of the design.
To sew it, bring the needle up near the patch edge. Pass the needle down and through the loop before you pull tight. Repeat this around the patch. The loops should sit along the edge in a neat row. This stitch rewards slow and even sewing.
Pros: decorative look, clear border, good for visible thread detail.
Cons: slower than a whip stitch, easier to make uneven, and not always the best choice for a very small patch.
Choose the blanket stitch if style matters as much as function. It holds well, but its biggest strength is the clean framed look it gives the patch.
Reinforce Corners and Stress Points So the Patch Stays Put
Corners lift first. That happens because bags bend, rub, and twist during normal use. The fix is simple. Add extra stitches at the corners and at any spot that may catch on clothing, straps, or zippers. This small step can make a big difference.
You can reinforce with a few overlapping backstitches, or you can make the stitches slightly closer together at the corners. If the patch covers a worn or weak area, you can also place a support patch inside the bag behind that spot. This creates extra strength without changing the outer look too much.
Pros of extra corner stitching: better hold, less peeling, longer life.
Cons: too many stitches can make the edge look heavy.
Pros of an inside support patch: stronger repair for damaged canvas.
Cons: more work and a thicker feel in that area.
Finish the Thread Cleanly and Check Your Work
A good finish matters. When you reach the end, do not cut the thread right away. Make one last stitch and leave a small loop. Pass the needle through that loop and pull snug. Repeat this one or two more times. That gives you a secure finish that is less likely to loosen.
Trim the thread close, but do not cut the knot itself. Then run your fingers around the patch edge. Look for any gap, curl, or loose point. Press the patch flat and check the inside of the bag too. You want the stitches to hold without pulling the fabric into puckers.
Pros of locking loops: simple and secure.
Cons: if you pull too hard, the edge can tighten and wrinkle.
A final inspection takes less than a minute, and it can catch small problems before they become big ones.
Fix Common Problems While Sewing Thick Canvas
If the needle feels stuck, do not force it with bare fingers. Use a thimble to push and smooth pliers to pull if needed. If the thread keeps knotting, shorten the thread length and smooth it with wax. Long thread may seem helpful, but it often twists and slows you down.
If the patch shifts, stop and reset it before you sew more. A small shift at the start becomes a large crooked line by the end. If the canvas puckers, your stitches may be too tight. Loosen the pull slightly on the next few stitches. The thread should hold the patch down, not squeeze the fabric.
If the edge lifts after sewing, add extra stitches in that area right away.
Fast fixes beat full do overs. Small corrections during the job are easier than removing a full row of stitches later.
FAQs
Can I sew a patch onto a backpack without sewing through the lining?
Yes, you often can. A whip stitch works well for this because it can catch the patch edge and only the top layer of canvas. Check inside the bag before you start so you know what sits behind the panel.
What is the best stitch for a beginner?
The whip stitch is usually the easiest for a beginner. It is simple, clear, and good for thick canvas. If you want more strength and do not mind moving slower, use a backstitch.
Should I iron the patch first if it has glue backing?
You can use heat backing to help hold the patch in place, but sewing is still the safer long term method on a backpack. Bags bend, rub, and carry weight. That can loosen glue over time.
What thread should I use on a heavy canvas backpack?
A strong polyester or nylon thread is a good choice. Waxed thread is also helpful because it tangles less and moves through thick fabric more easily.
How close should my stitches be?
Keep them small and even. A close and steady spacing usually looks cleaner and holds better than large gaps. Pay extra attention to corners because those spots lift first.

Hi, I’m Luna Beck — the founder and voice behind Urban Pack Vault. I’m passionate about helping people find bags that perfectly match their lifestyle. From backpacks to travel luggage, I research, review, and recommend so you never have to second-guess your next purchase.