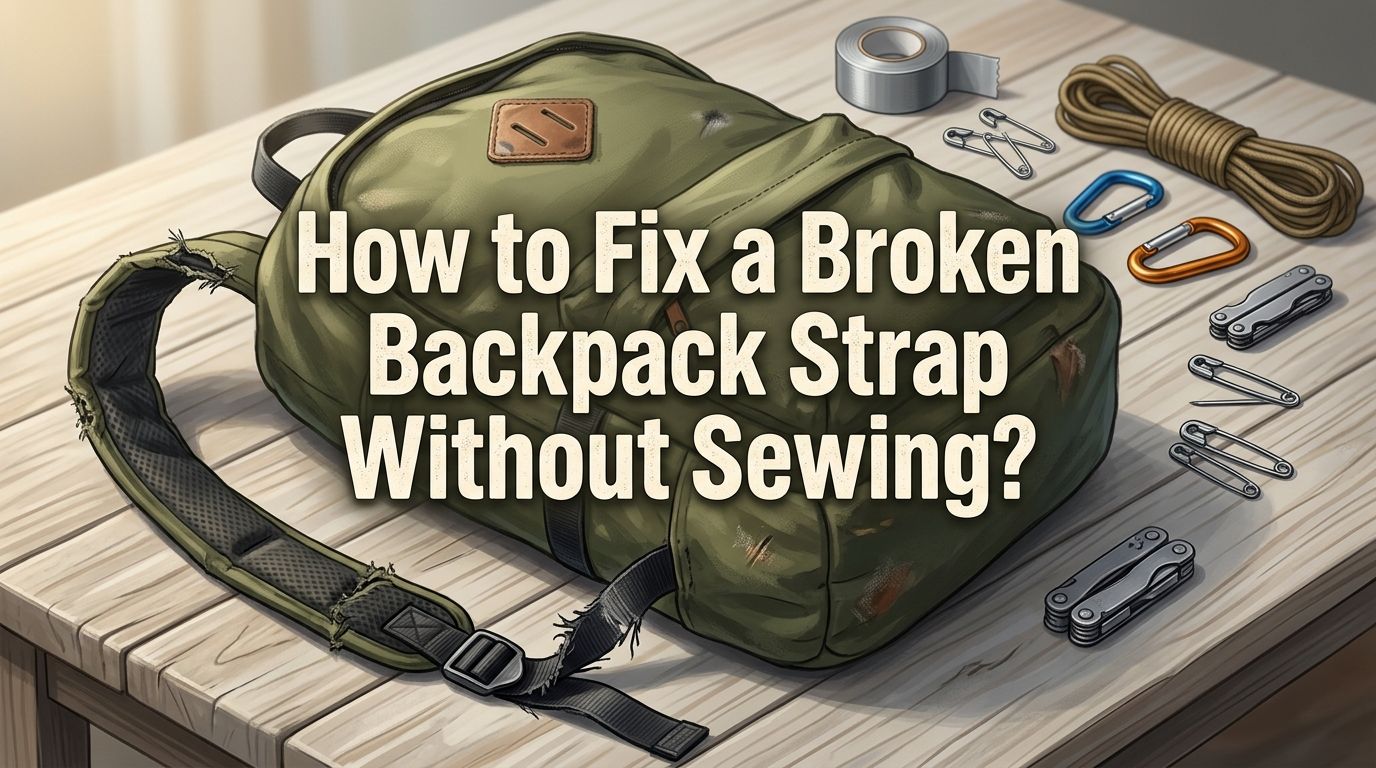
How to Fix a Broken Backpack Strap Without Sewing?
A backpack strap snaps at the worst possible time. You might be heading to school, catching a flight, or halfway through a trail. The good news? You do not need a needle and thread to fix it. Several quick and effective methods can restore your backpack strap using items you probably already own.
Every year, millions of backpacks end up in landfills because people assume a broken strap means the bag is done. That is simply not true.
With the right approach, you can repair a torn, detached, or frayed strap in minutes. This guide covers seven proven no sew repair methods that work on nylon, polyester, and canvas backpacks alike.
In a Nutshell
- Fabric glue is one of the strongest no sew options for reattaching a torn strap. Industrial adhesives like E6000 or Barge cement bond nylon and polyester with impressive hold. They cure flexible, which means the repair bends with the strap instead of cracking apart.
- Duct tape provides a fast emergency fix that can hold a strap together for days or even weeks. Wrapping the tape tightly in overlapping layers creates surprising strength. This works best as a short term solution while you gather supplies for a more permanent repair.
- Iron on patches and fusible webbing tape can bond fabric layers together using heat alone. These work well for torn or frayed sections where the strap material is still mostly intact.
- Zip ties and cable ties offer a quick mechanical fix for straps that have pulled away from buckles or attachment points. They thread through webbing easily and lock tight with minimal effort.
- Rivets and grommets create a permanent no sew connection between your strap and the backpack body. A basic rivet setter tool and a few rivets can produce a repair that rivals the original factory construction.
- Replacing a broken buckle requires no sewing at all in most cases. You can slide the old buckle off the webbing, thread a new one on, and fold the strap end back through itself for a secure hold.
Why Backpack Straps Break in the First Place
Understanding why your strap failed helps you choose the right repair and prevent it from happening again. The most common cause is stress at the attachment point where the strap meets the backpack body. This area carries all the weight and absorbs every tug and pull.
Overloading your backpack puts extra force on the strap connections. A standard school backpack handles about 10 to 15 pounds comfortably. Pushing beyond that limit accelerates wear on both the strap material and the stitching that holds it in place.
Sun exposure and heat also weaken backpack materials over time. Nylon and polyester degrade under UV light. A backpack left in a hot car or direct sunlight regularly will develop brittle straps that tear more easily. Knowing this, you can store your bag in a cool, shaded spot to extend its life after you complete your repair.
Assess the Damage Before You Start
Before grabbing any tools, take a close look at the break. The type of damage determines which repair method will work best. A strap that has torn away from the bag body needs a different fix than a strap with a cracked buckle or frayed webbing.
Check if the strap fabric itself is intact. If the webbing is still strong but has simply pulled free from the bag, you may only need to reattach it. If the strap material is torn, frayed, or thinned from wear, you will need to reinforce the damaged section before reconnecting it.
Also inspect the attachment point on the backpack body. If the fabric around the connection has ripped, that area needs reinforcement too. Applying a patch or adhesive to the bag itself will give your repair a solid foundation. Skipping this step often leads to the fix failing within days.
Method 1: Fabric Glue for a Strong Bond
Fabric glue is the closest thing to sewing you can get without a needle. Industrial strength adhesives like E6000, Barge cement, or Gear Aid Seam Grip create bonds strong enough to hold a loaded strap. These products cure flexible, which is critical for a strap that bends and moves constantly.
Start by cleaning both surfaces with rubbing alcohol. Remove any dirt, oil, or frayed threads. Apply a thin, even layer of glue to both sides you plan to join. Press the surfaces together firmly and clamp or clip them in place. Most fabric adhesives need 24 to 72 hours to fully cure.
For best results, overlap the torn ends by at least two inches. This gives the glue more surface area to grip. Once cured, the bond can handle significant weight.
Pros: Very strong hold, flexible when dry, waterproof with most brands, clean appearance.
Cons: Long cure time, strong fumes during application, requires clean surfaces, may not hold under extreme loads above 30 pounds.
Method 2: Duct Tape Emergency Repair
Duct tape is the classic quick fix, and it works surprisingly well on backpack straps. A properly wrapped duct tape repair can hold a strap together for weeks of regular use. The key is using enough tape and wrapping it in the right pattern.
Align the broken strap ends so they overlap by at least three inches. Wrap duct tape tightly around the overlap area in a spiral pattern, covering the entire damaged section. Add a second layer going in the opposite direction. Three to four layers provide the best strength.
For extra durability, fold a strip of duct tape over itself to create a flat reinforcement strip. Place this strip along the length of the break, then wrap over it with more tape. This sandwiched layer adds significant tensile strength.
Pros: Fast application, cheap and widely available, no cure time needed, easy to redo if needed.
Cons: Looks rough, loses adhesion in extreme heat, can leave sticky residue, not a long term fix for heavy loads.
Method 3: Iron On Patches and Fusible Tape
Iron on repair materials use heat activated adhesive to bond fabric layers together. Fusible webbing tape is especially useful for backpack strap repairs because it comes in narrow strips that match the width of most straps.
Cut a piece of fusible tape or an iron on patch to cover the damaged area with at least one inch of overlap on each side. Place the patch over the break. Cover it with a thin cotton cloth to protect the backpack material. Press a warm iron (medium heat, no steam) onto the cloth for 30 seconds. Lift, let cool, and repeat two to three times.
This method works best on fabric straps rather than smooth nylon webbing. The heat adhesive grips textured surfaces better. Always test a small hidden area first to make sure your backpack material can handle the iron temperature.
Pros: Clean finished look, strong bond on fabric surfaces, no messy glue, fast process.
Cons: Not ideal for slick nylon webbing, requires an iron, can damage some synthetic materials, weaker than glue on high stress areas.
Method 4: Zip Ties for Quick Mechanical Fixes
Zip ties offer an instant mechanical connection that requires zero drying time. This method works especially well when a strap has pulled free from a buckle or D ring. You can thread a heavy duty zip tie through the webbing and around the hardware to create a secure loop.
Use a sharp point or small hole punch to create a hole through the strap webbing. Thread a thick zip tie through the hole and around the attachment point. Pull it tight and trim the excess tail. For added security, use two zip ties side by side.
You can also use zip ties to splice two strap sections together. Punch matching holes through both pieces, then lace zip ties through in a zigzag pattern. This creates a surprisingly strong connection that distributes the load across multiple points.
Pros: Instant fix, extremely cheap, lightweight, easy to carry as emergency supplies, strong under tension.
Cons: Can dig into shoulders if placed poorly, visible and not attractive, plastic can become brittle in extreme cold, not adjustable once locked.
Method 5: Rivets for a Permanent Fix
Rivets provide the most permanent no sew repair option. A properly set rivet creates a mechanical fastener that can be stronger than the original stitching. You need a basic rivet setter tool, a hammer, and the appropriate size rivets for your strap thickness.
Place the two layers of material you want to connect together. Punch or drill a small hole through both layers. Insert the rivet from one side, place the backing cap on the other side, and set the rivet with your tool and a firm hammer strike. Use at least three to four rivets spaced evenly across the strap width.
This method excels at reattaching straps to the backpack body. The rivets create multiple solid anchor points. For the strongest result, add a small reinforcement patch of nylon or canvas behind the rivet area to prevent the material from tearing around the holes.
Pros: Extremely durable, permanent fix, distributes load well, looks professional.
Cons: Requires a rivet tool, not easily reversible, holes weaken the fabric if placed too close together, slight learning curve on first attempt.
Method 6: Replacing a Broken Buckle Without Sewing
A cracked or snapped buckle is one of the most common backpack strap failures. The good news is that buckle replacement almost never requires sewing. Most buckles simply slide onto the webbing strap and hold through friction and the strap’s fold back design.
Remove the broken buckle by cutting away any damaged plastic with wire cutters or scissors. Thread the strap end through the new buckle’s center bar. Fold the strap end back on itself by about two inches and secure it with a zip tie, rivet, or fabric glue.
Match the new buckle width to your strap size. Standard backpack webbing comes in 3/4 inch, 1 inch, and 1.5 inch widths. An incorrect size will slip and fail. Most outdoor supply shops and craft stores carry replacement buckles in these common sizes.
Pros: Restores full strap adjustability, easy process, buckles are cheap, works with any no sew fastening method.
Cons: Need to find the right buckle size, cut end of webbing may fray (seal with a lighter flame), requires a secondary method to secure the fold.
Method 7: Paracord Wrap Reinforcement
Paracord can transform a weak or torn strap section into a reinforced grip. Wrapping paracord tightly around a damaged strap area adds strength, prevents further tearing, and improves grip comfort. This technique is popular among hikers and outdoor enthusiasts.
Start by tying a secure knot at one end of the damaged section. Wrap the paracord tightly in a coil pattern, keeping each loop snug against the last. Cover at least two inches beyond the tear on each side. Tie off the end with a double knot and trim the excess. You can melt the cut end with a lighter to prevent fraying.
For added holding power, apply a thin layer of fabric glue under the paracord before wrapping. The combination of adhesive and mechanical wrapping creates a repair that handles heavy loads with ease.
Pros: Very strong, adds comfort padding, looks good in a rugged style, uses a versatile material you can repurpose later.
Cons: Takes time to wrap neatly, adds slight bulk to the strap, knots can loosen over time without glue, requires enough paracord length.
How to Seal Frayed Strap Ends
Fraying is the silent killer of backpack straps. A frayed strap end unravels quickly and weakens the entire strap. Sealing the ends is an essential step in any repair and a smart preventive measure for healthy straps too.
The fastest method is a flame seal. Hold the frayed nylon or polyester end near a lighter flame (not directly in it) until the fibers melt together slightly. This takes only two to three seconds. Press the melted end flat with the side of a metal tool or old spoon while still warm.
Clear nail polish also seals frayed edges effectively. Apply a thin coat over the frayed area and let it dry completely. The hardened polish locks the fibers in place and prevents further unraveling. This trick works on both cut ends and areas where surface fraying has started along the strap length.
Tips for Making Your Repair Last Longer
A good repair holds only as long as the preparation behind it. Surface preparation is the single most important factor in any adhesive based fix. Always clean the repair area with rubbing alcohol before applying glue, tape, or iron on patches.
Avoid overloading your backpack after a repair. Reduce the weight you carry by 20 to 30 percent for the first week to let adhesives fully cure and mechanical fixes settle into place. This break in period prevents stress on fresh bonds.
Reinforce your repair from both sides when possible. A patch or tape applied to the front and back of a strap doubles the strength. Consider combining two methods for heavy use packs. For example, use fabric glue to bond the surfaces and add rivets for mechanical security. This belt and suspenders approach produces the most reliable long term results.
When to Replace Your Backpack Instead of Repairing It
Not every backpack deserves a repair. If both straps have failed, the fabric is thinning across multiple areas, or the bag body itself is tearing, replacement makes more sense. A single strap fix on an otherwise healthy pack is always worth doing. Multiple simultaneous failures signal a bag that has reached the end of its useful life.
Look at the zipper condition, the bottom panel integrity, and the overall fabric strength. If those elements are solid, your strap repair will give the backpack many more months or years of service. A ten minute no sew fix can easily save you the cost of a new bag.
Also consider the value of the backpack. A premium hiking pack or a bag with sentimental importance justifies a careful repair effort. A basic pack that cost very little might not be worth your time and repair materials.
What Not to Do When Fixing a Backpack Strap
Some common mistakes can make a strap repair worse than the original damage. Never use regular white craft glue or hot glue on a backpack strap. White glue has no flexibility and cracks under stress. Hot glue peels away from nylon and polyester within hours of use.
Do not skip the surface cleaning step. Oil from your hands, dirt, and moisture all prevent adhesives from bonding properly. Even a quick wipe with rubbing alcohol makes a dramatic difference in how well your repair holds.
Avoid placing tape or patches only on one side of the strap. A single sided repair creates a weak point where the strap bends. The uncovered side pulls away from the fix. Always reinforce both surfaces of the damaged area for balanced strength.
Frequently Asked Questions
Can fabric glue hold a backpack strap under heavy weight?
Yes, industrial fabric adhesives like E6000 and Barge cement can handle significant loads. These adhesives cure flexible and bond strongly to nylon and polyester. Most hold well under 20 to 25 pounds of sustained weight. For heavier loads, combine glue with a mechanical fastener like rivets or zip ties for extra security.
How long does a duct tape backpack strap repair last?
A well wrapped duct tape repair typically lasts one to four weeks of daily use. The exact duration depends on the weight you carry, weather exposure, and how many layers of tape you applied. Duct tape works best as a temporary fix while you plan a more permanent solution using glue or rivets.
Will iron on patches work on nylon backpack straps?
Iron on patches bond best to textured fabric surfaces. Smooth nylon webbing does not provide enough grip for heat activated adhesive to hold reliably. If your strap is made of canvas, cotton blend, or textured polyester, iron on patches work well. For slick nylon, choose fabric glue or mechanical fasteners instead.
What is the fastest way to fix a backpack strap on the trail?
Duct tape and zip ties are the two fastest field repair options. Both require zero cure time and minimal tools. Wrap duct tape around the break in multiple layers or thread zip ties through the webbing to rejoin the separated pieces. Carry a few zip ties and a small roll of duct tape in your pack as a standard emergency kit.
Can I use superglue to fix a backpack strap?
Superglue (cyanoacrylate) is not ideal for strap repairs. It dries rigid and brittle, which means it cracks and fails as soon as the strap flexes under load. Superglue works only for sealing frayed edges to stop unraveling. For the actual strap repair, use a flexible fabric adhesive designed for gear and clothing.
How do I prevent my backpack straps from breaking again?
Avoid overloading your pack beyond its recommended weight capacity. Store the backpack away from direct sunlight and heat to prevent UV degradation of the nylon or polyester. Check the strap attachment points every few months for signs of wear, fraying, or loosening. Catching early damage lets you reinforce the area before a full break occurs.

Hi, I’m Luna Beck — the founder and voice behind Urban Pack Vault. I’m passionate about helping people find bags that perfectly match their lifestyle. From backpacks to travel luggage, I research, review, and recommend so you never have to second-guess your next purchase.